LittleSpeaker
What is LittleSpeaker
The idea is to build a small mono speaker that is repairable, hackable and can do some more advanced things than just being a Bluetooth speaker.
Design of the enclosure is by Jennifer Leis, Firmware and electronics by me.
You can find all design files and the firmware in the LittleSpeaker Github Repository
This blog entry is basically a modified Readme from that repository.
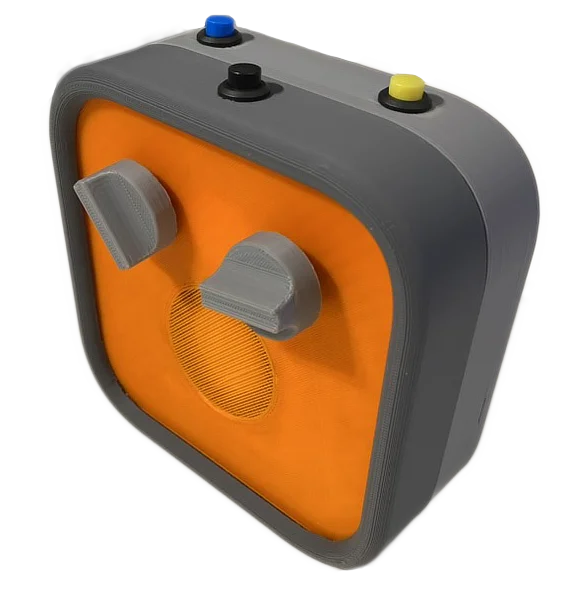
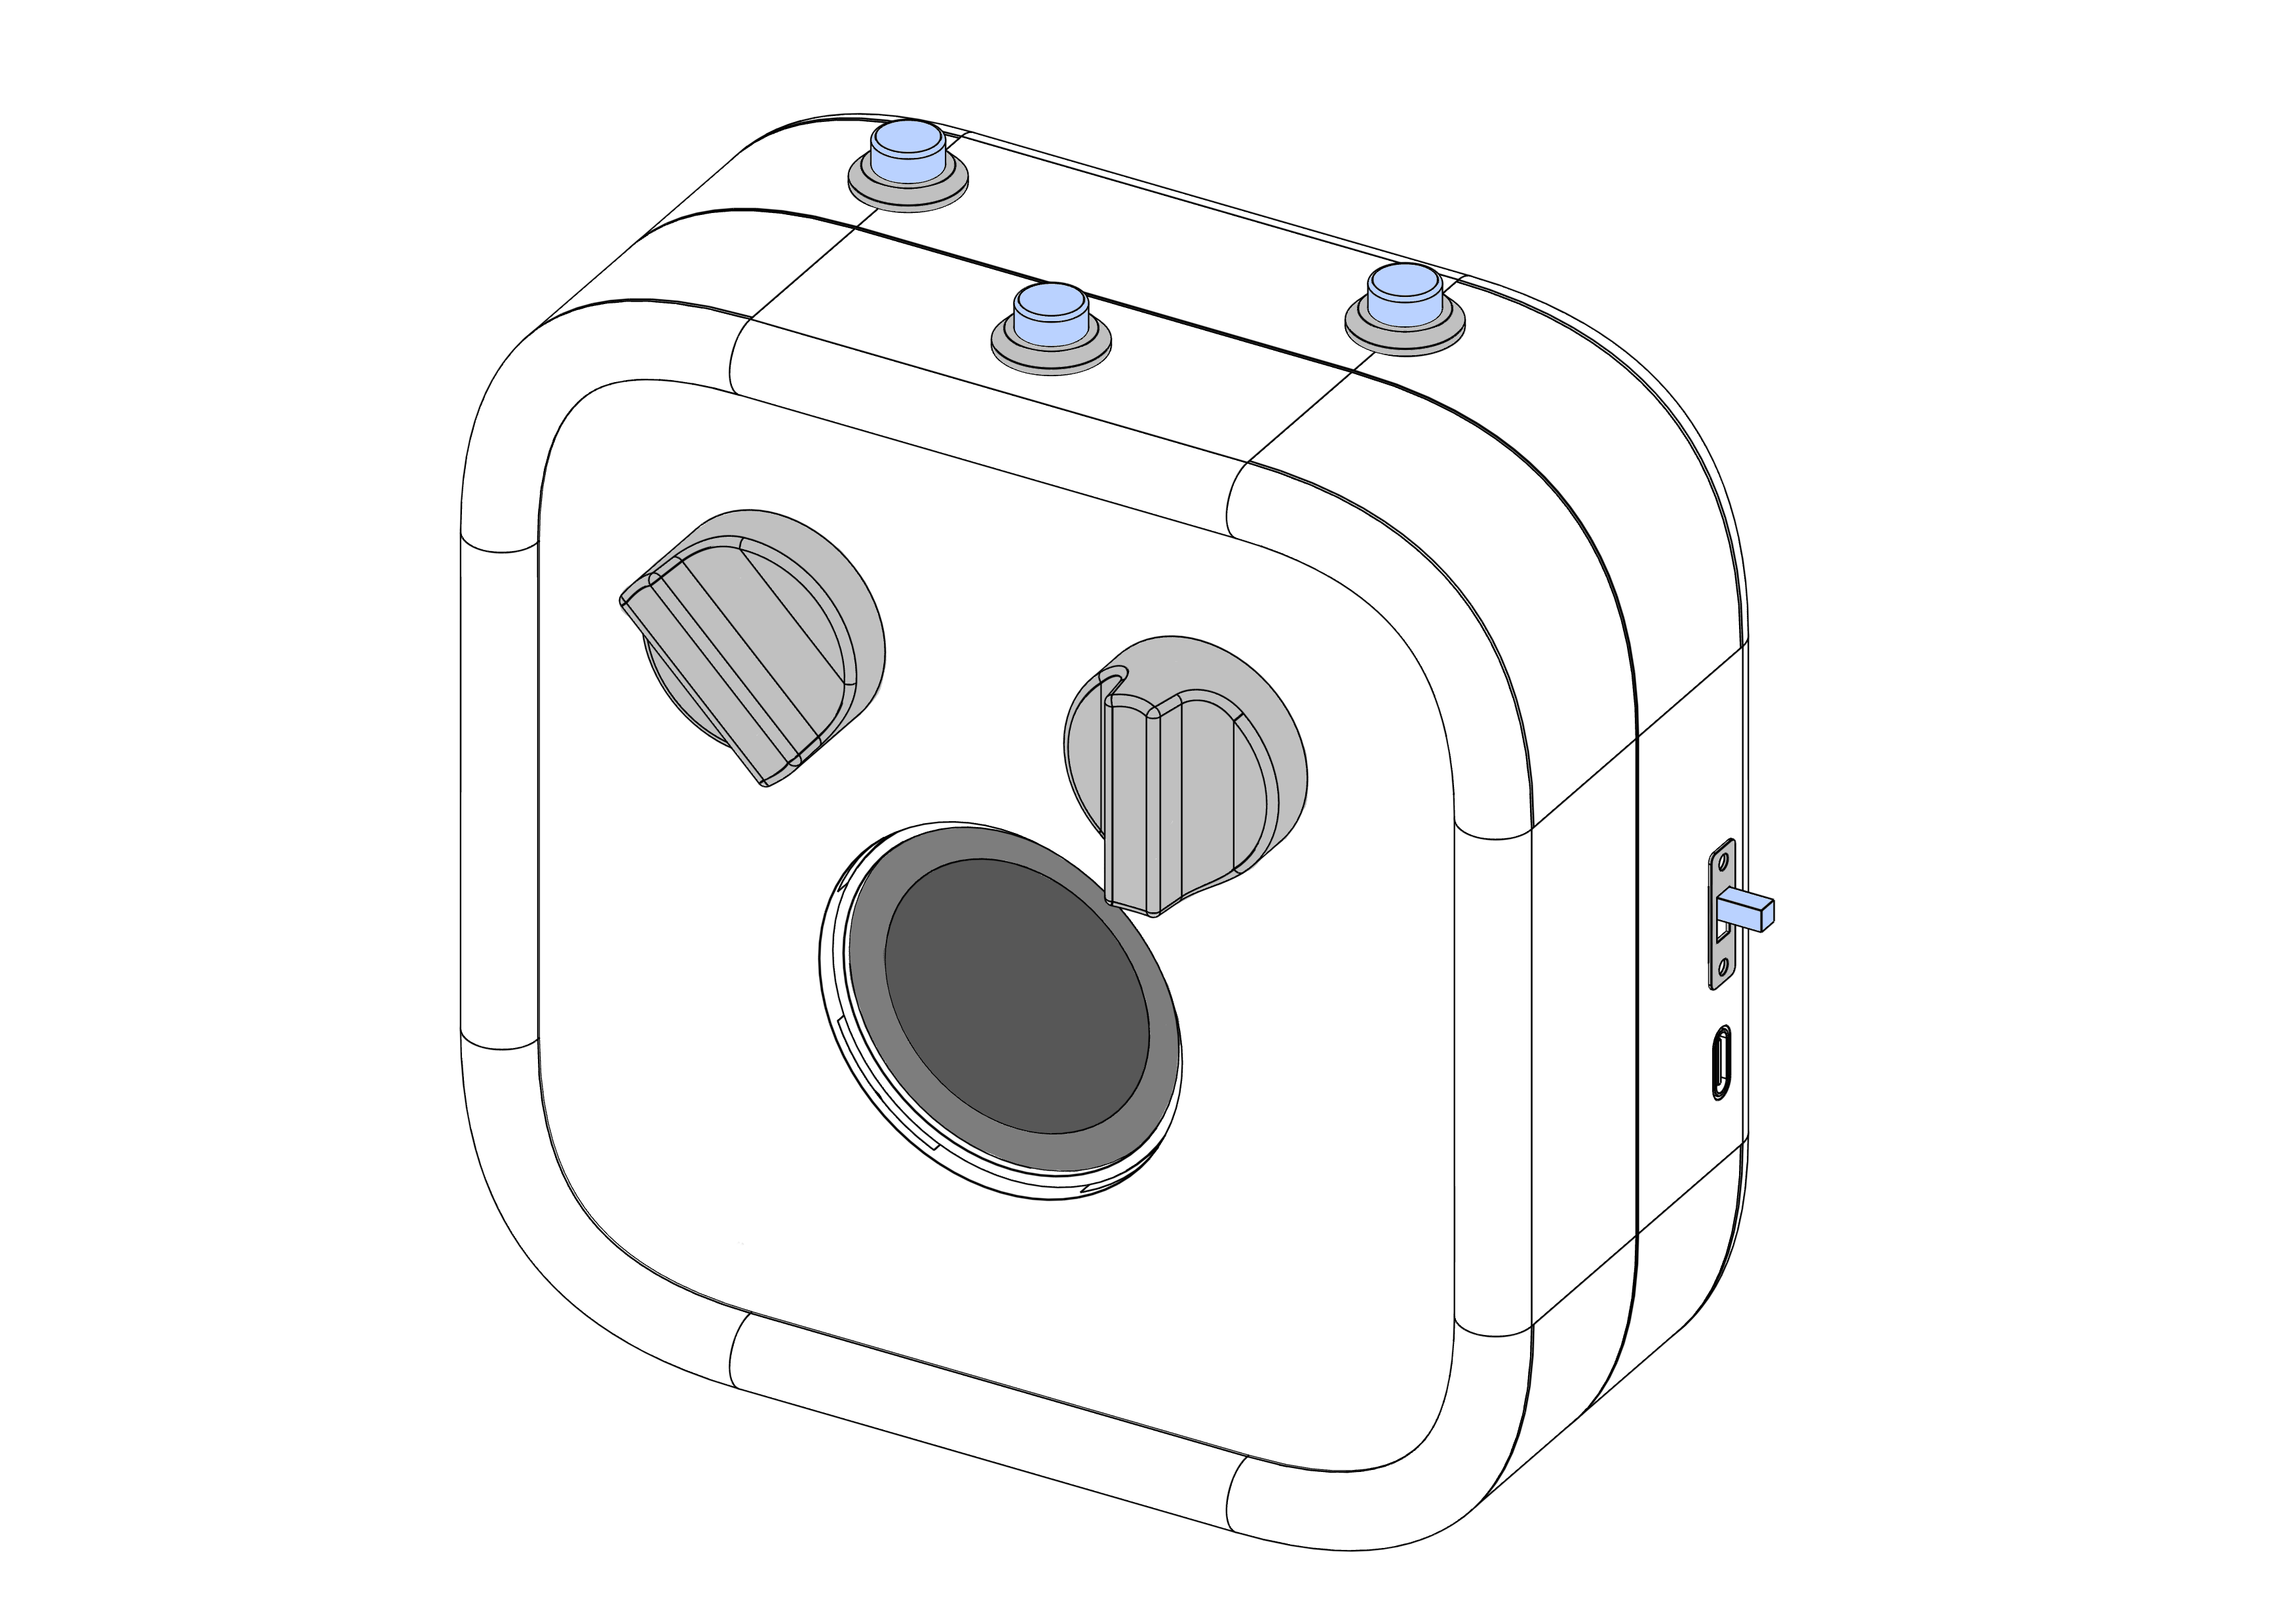
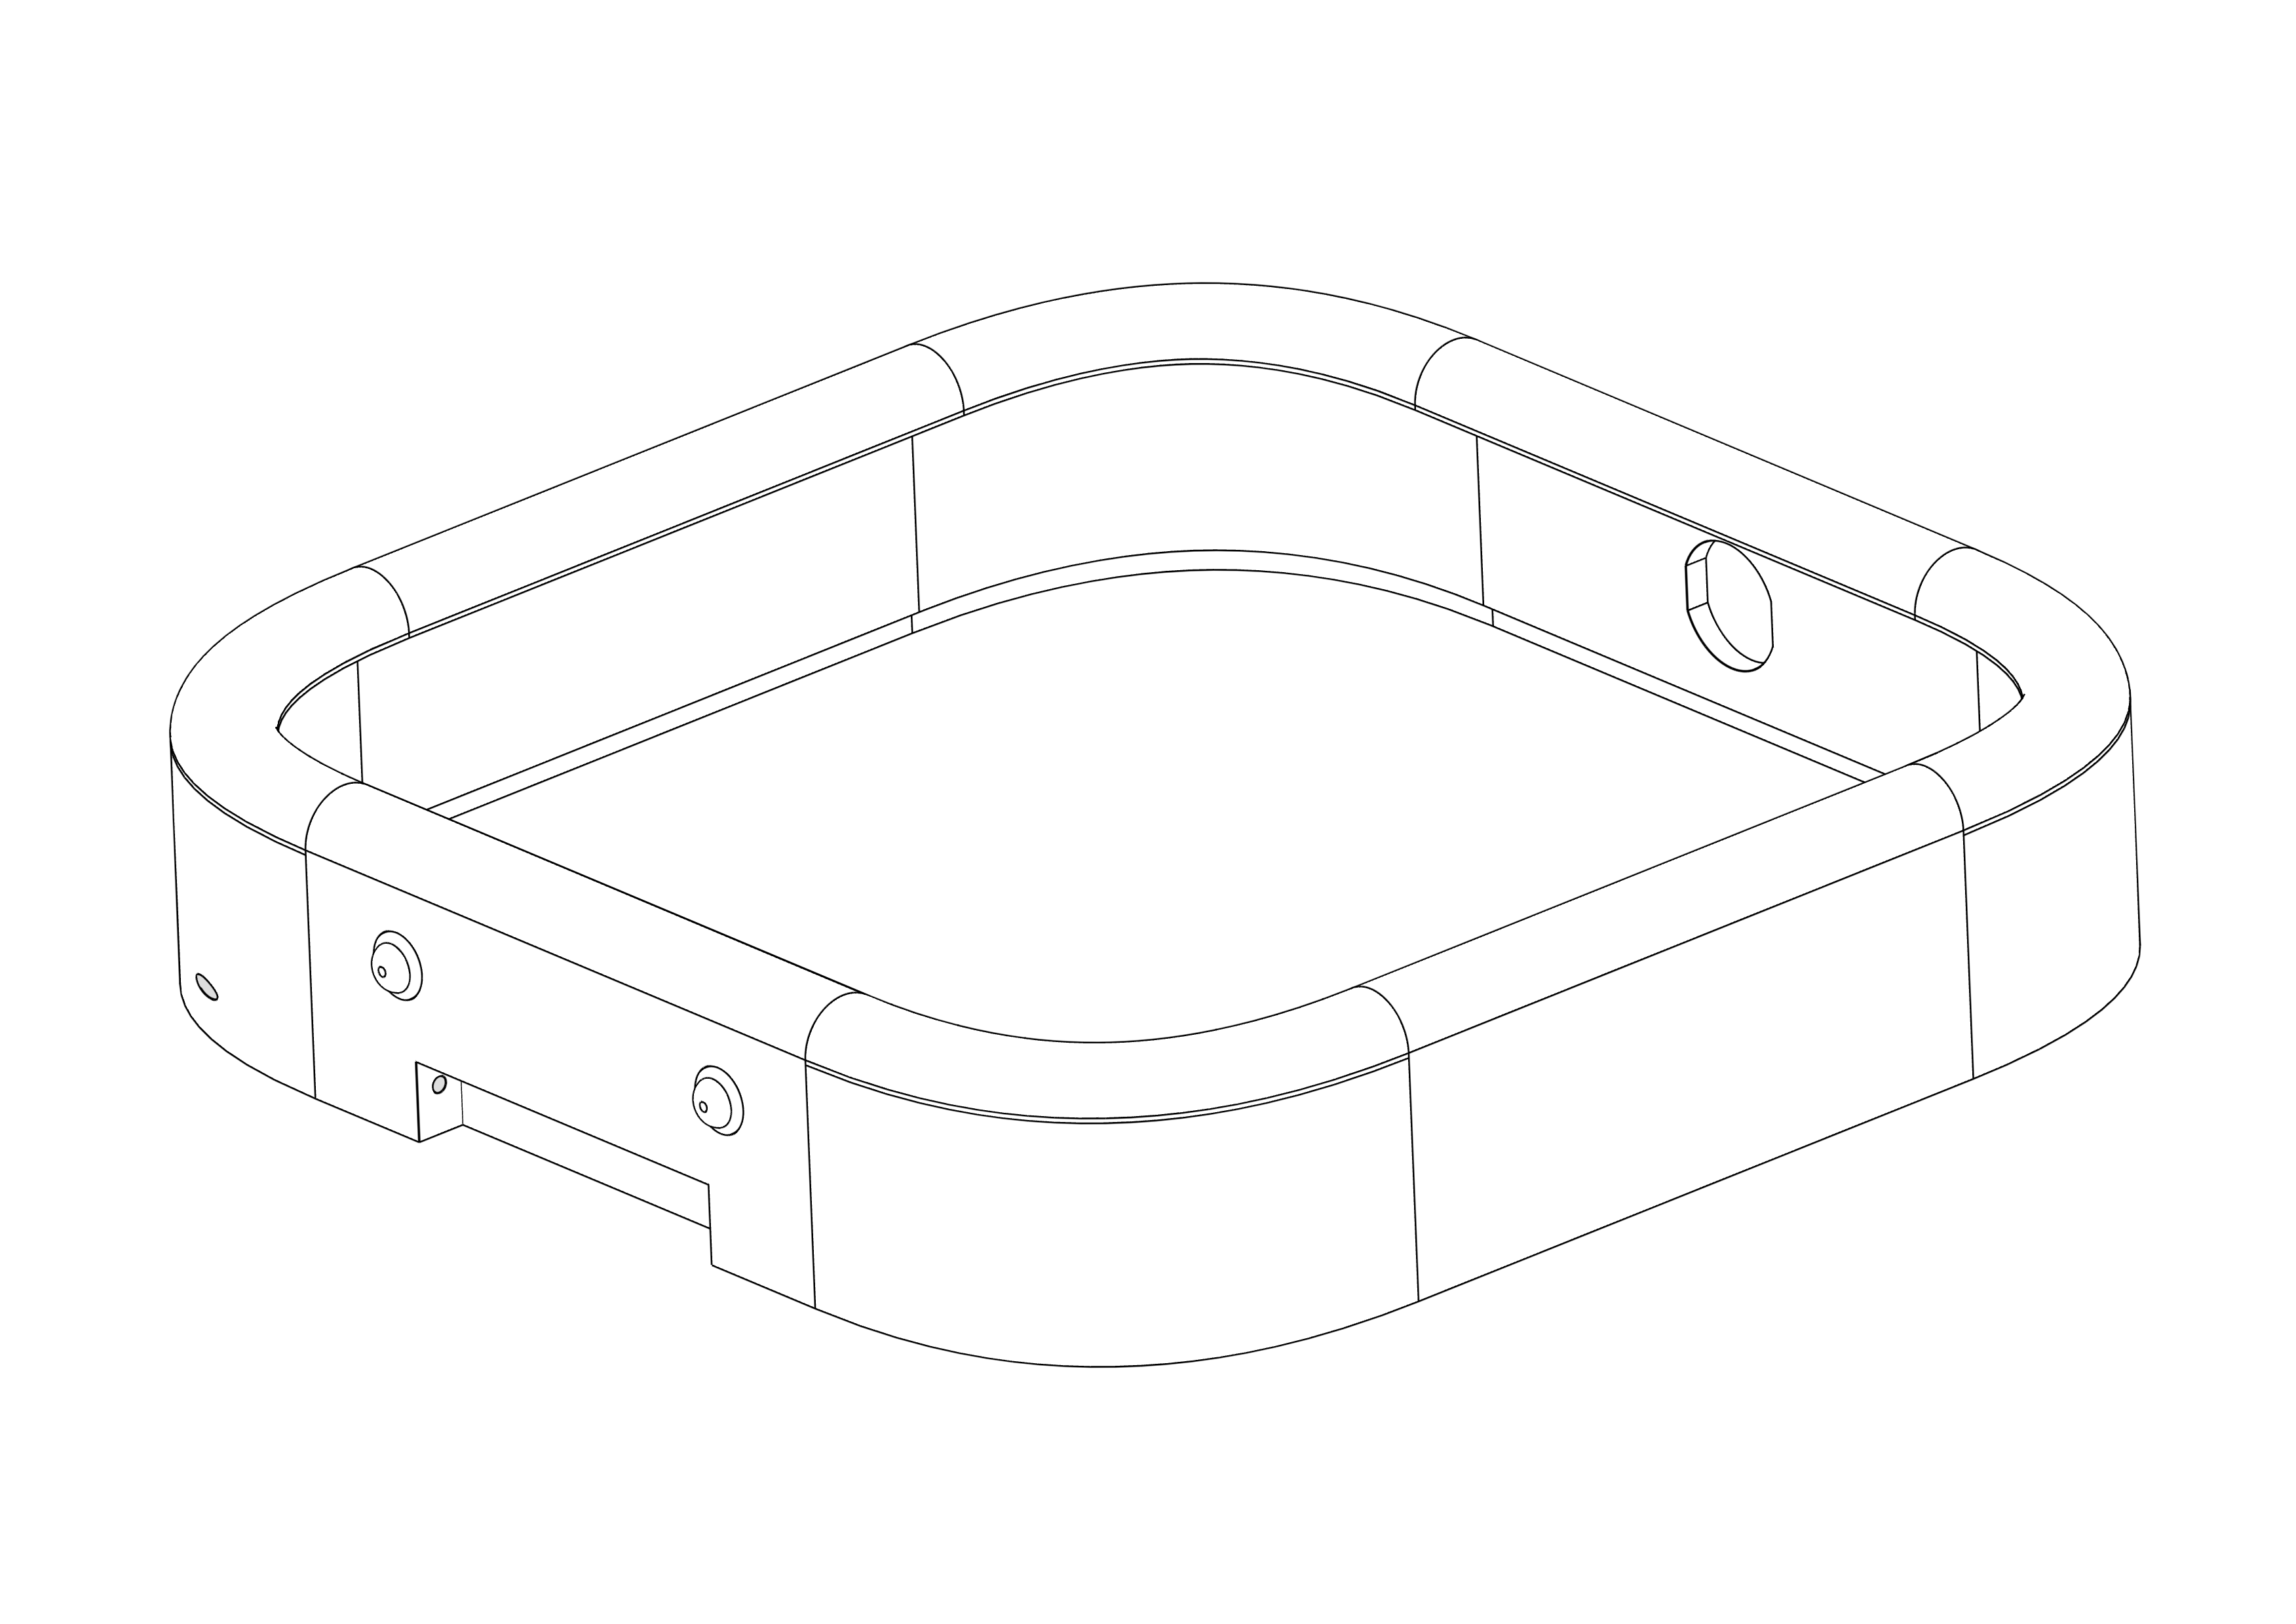
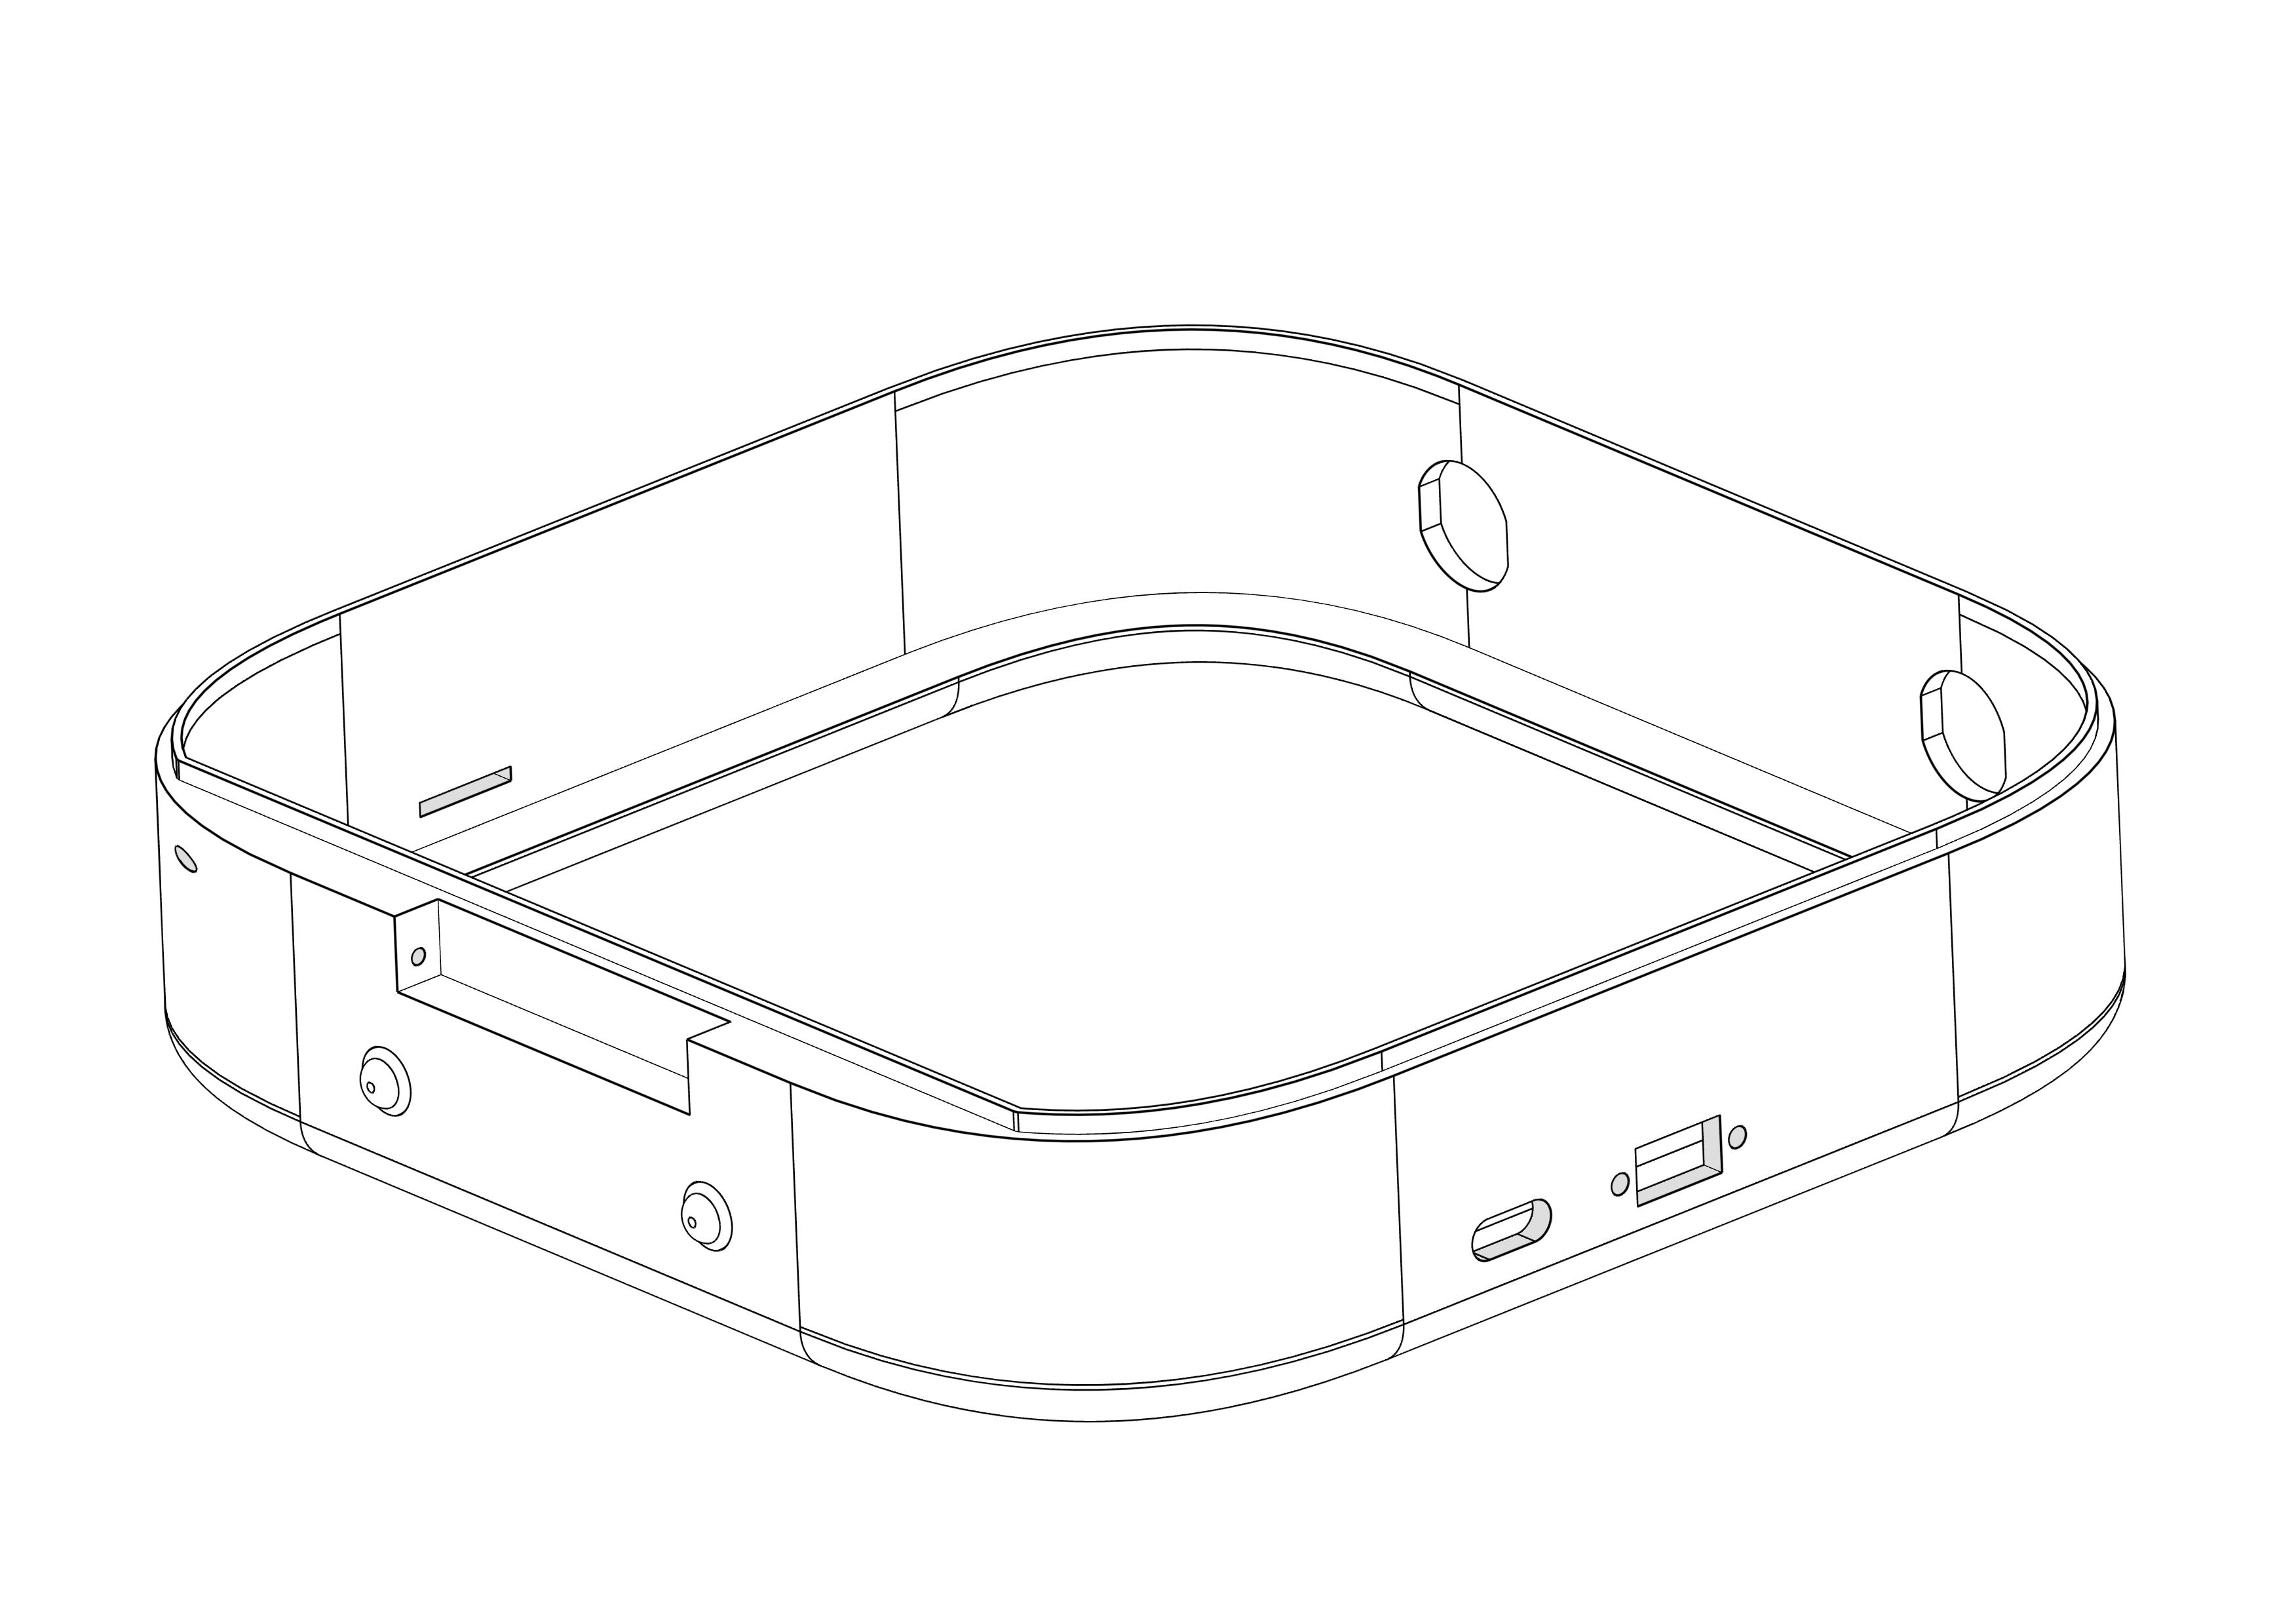
Enclosure
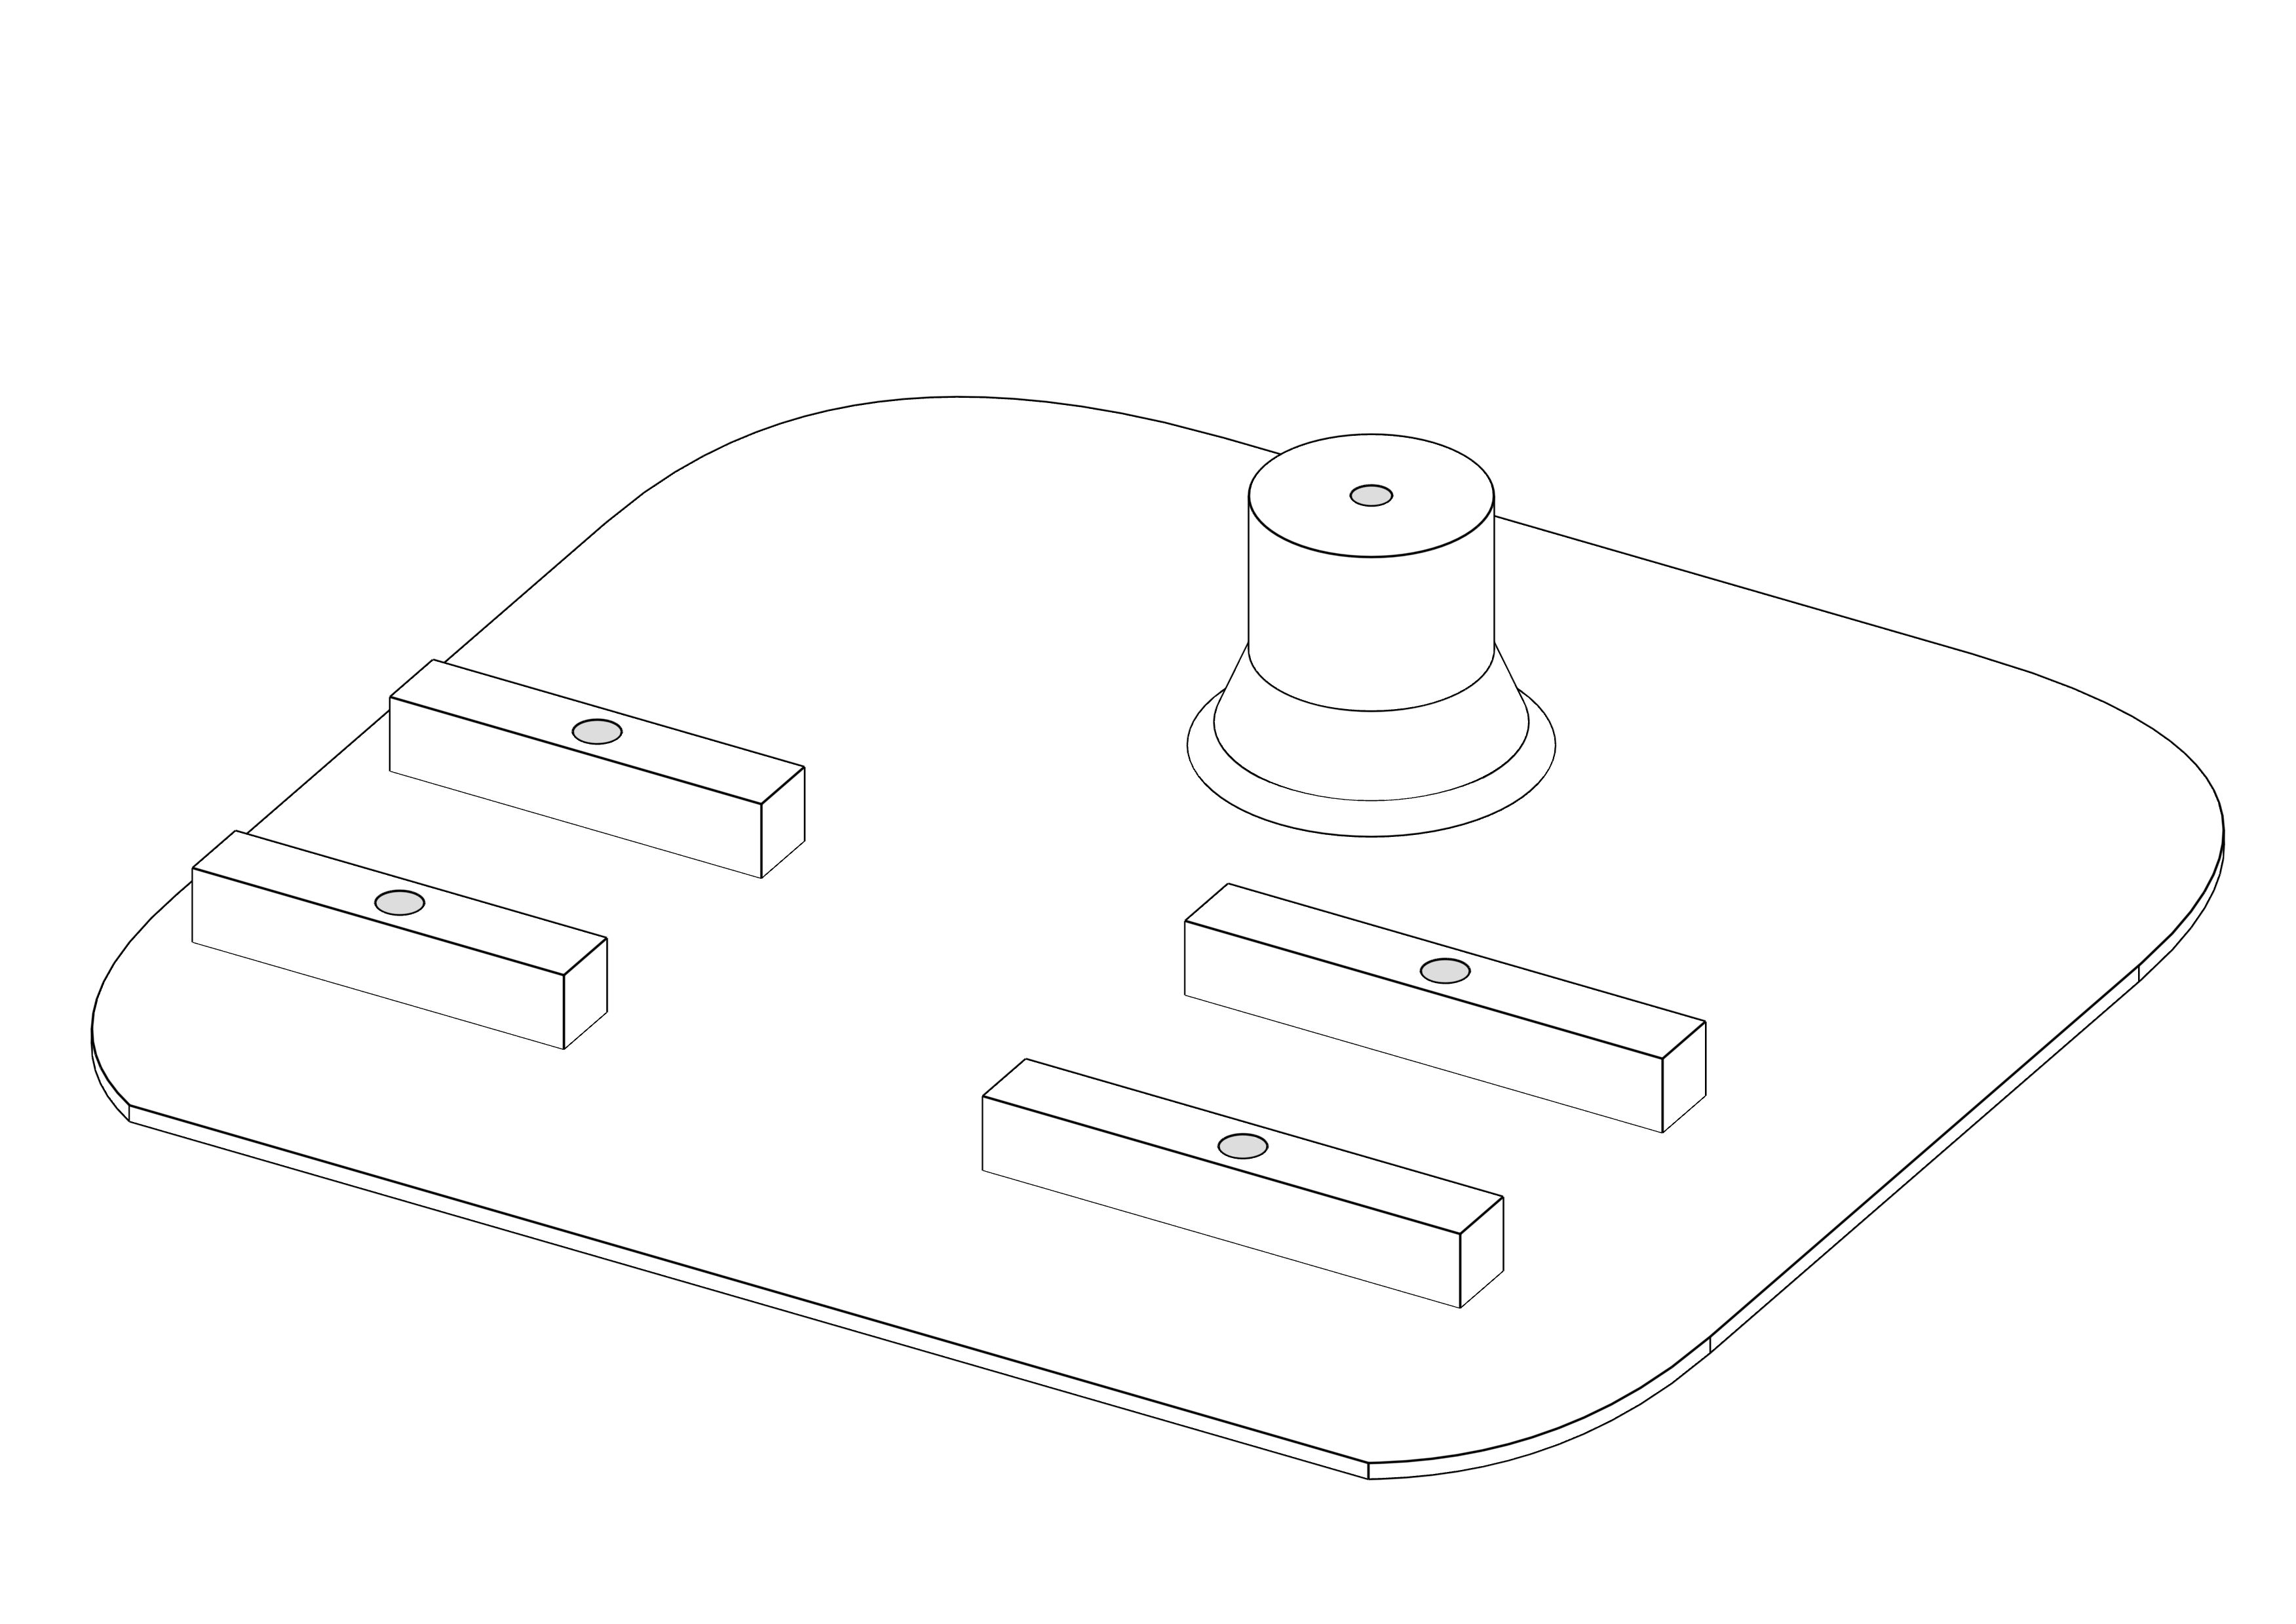
The prototype enclosure was 3D printed and is held together by a hinge and just one M3 screw.
You will need:
-
1x Front bezel
-
1x Back bezel
-
1x Back plate
-
1x Front plate
-
1x Hinge
-
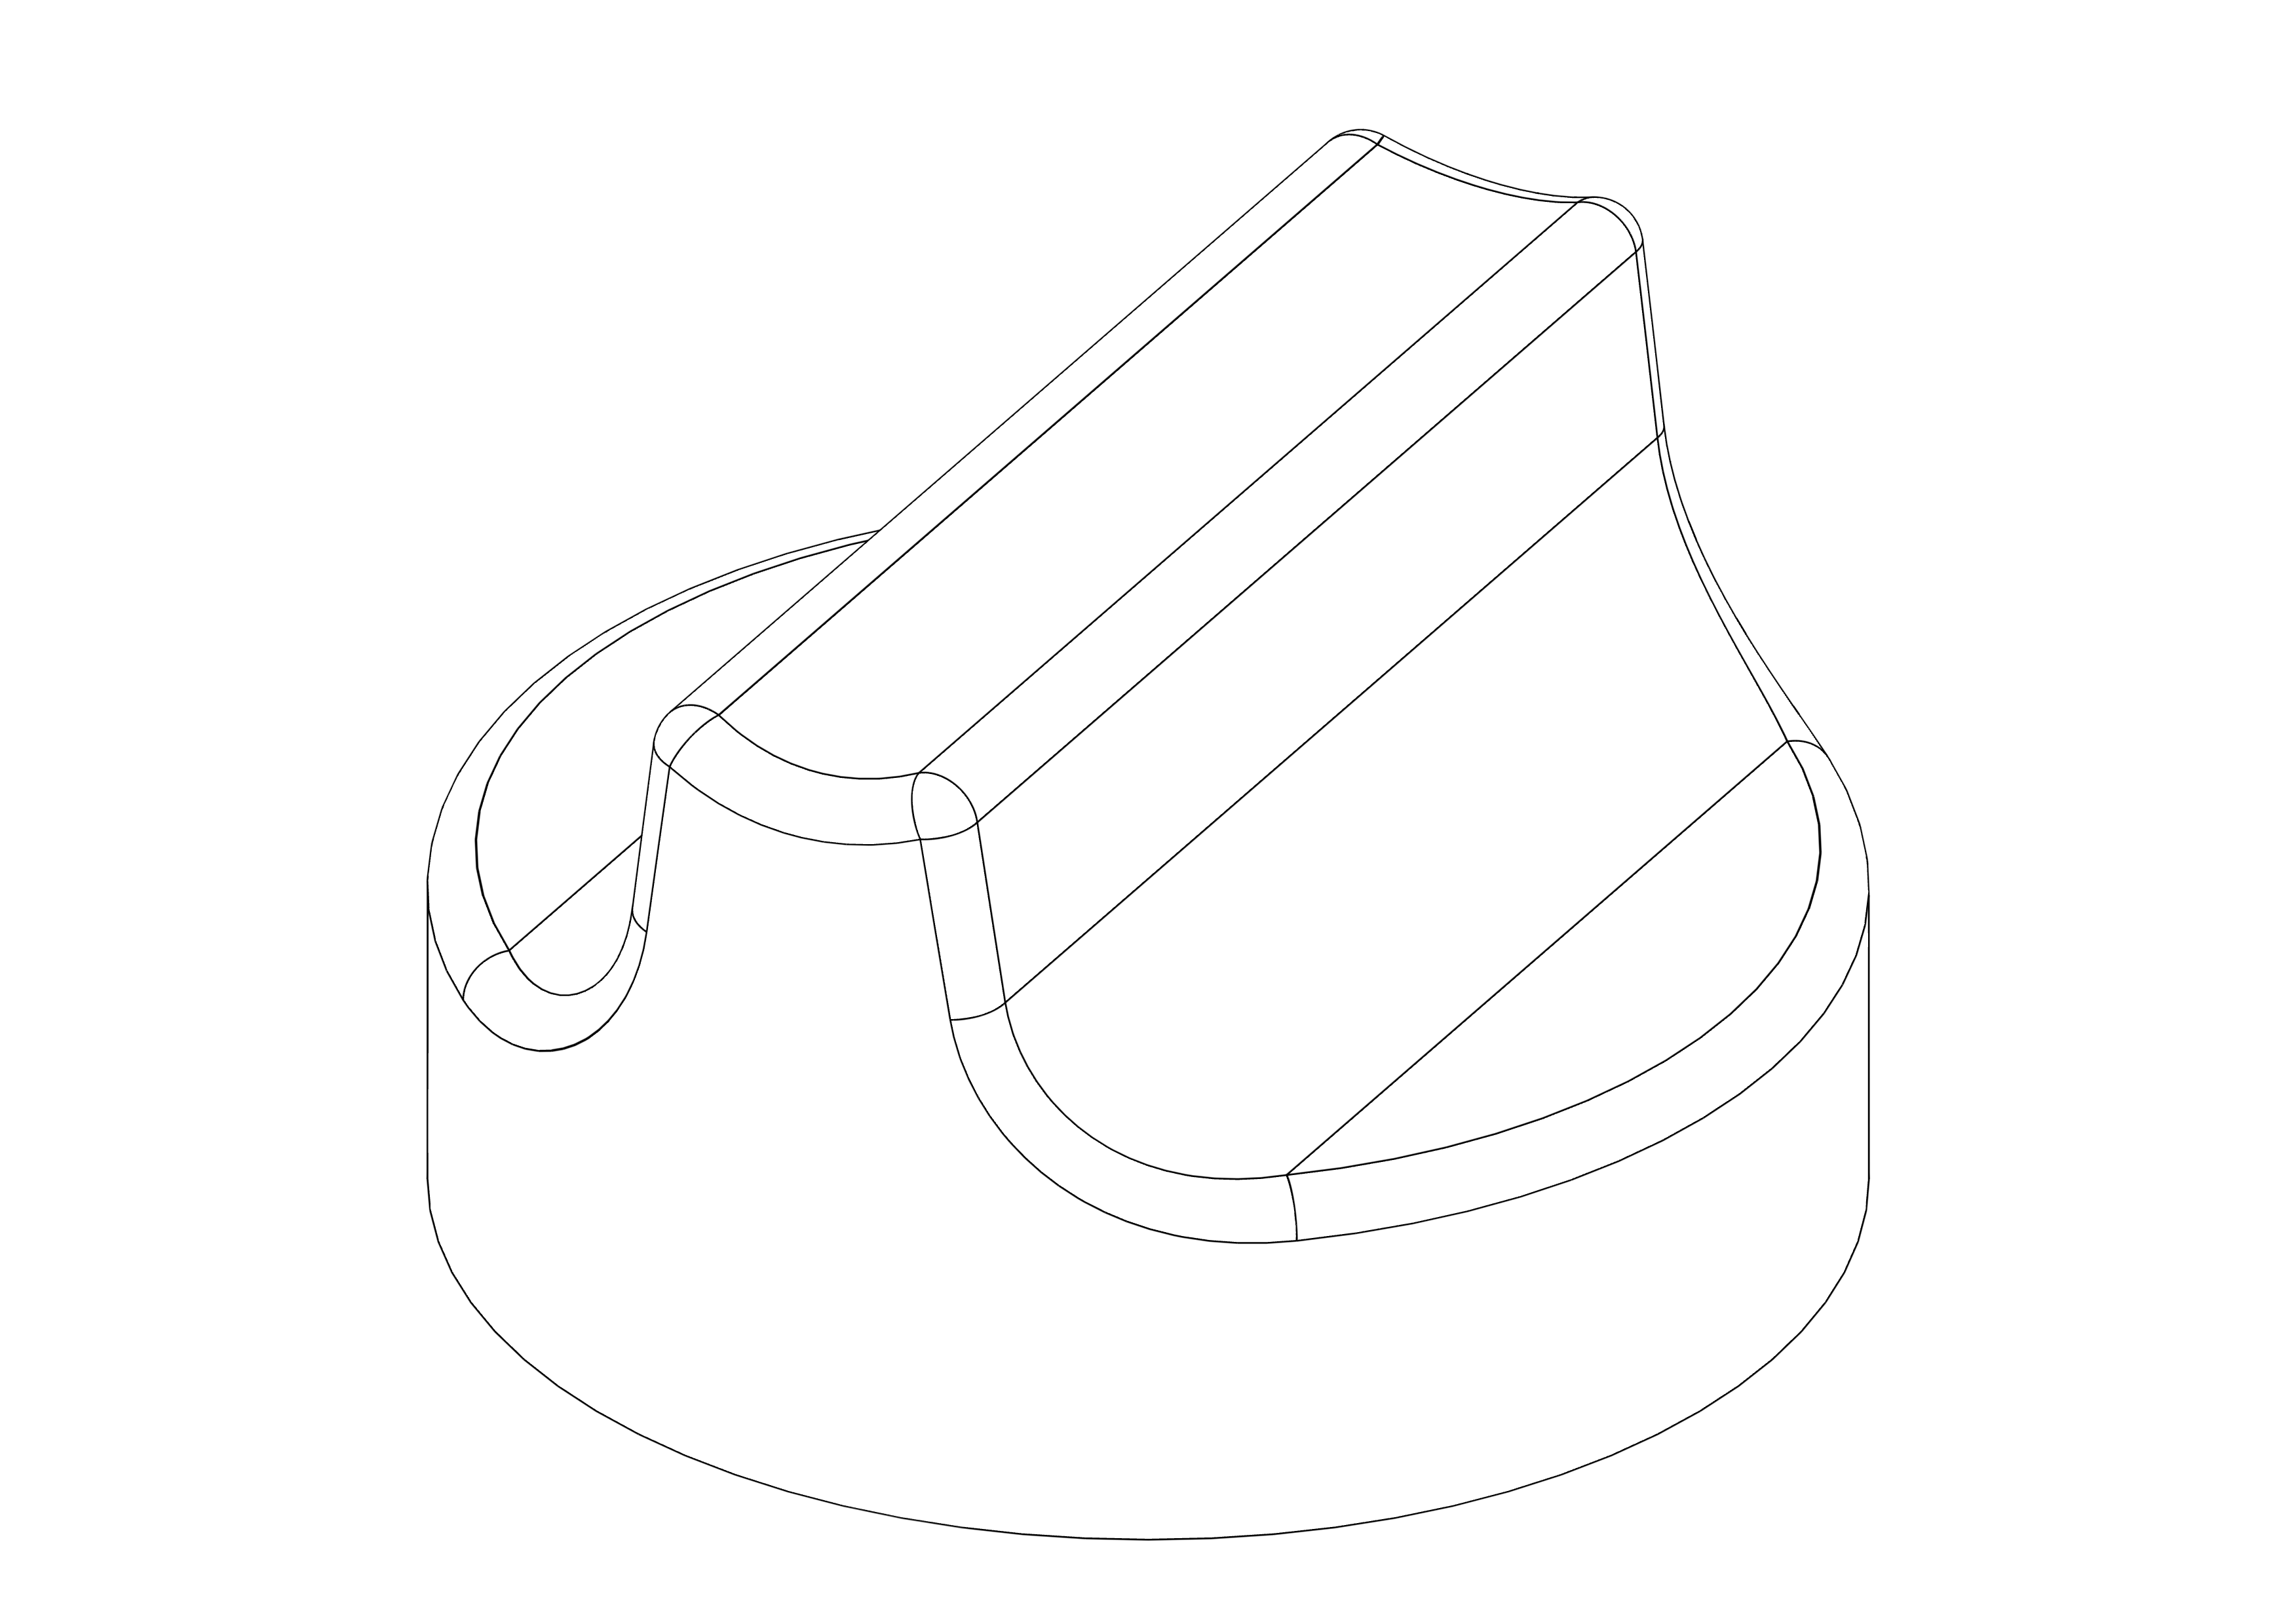
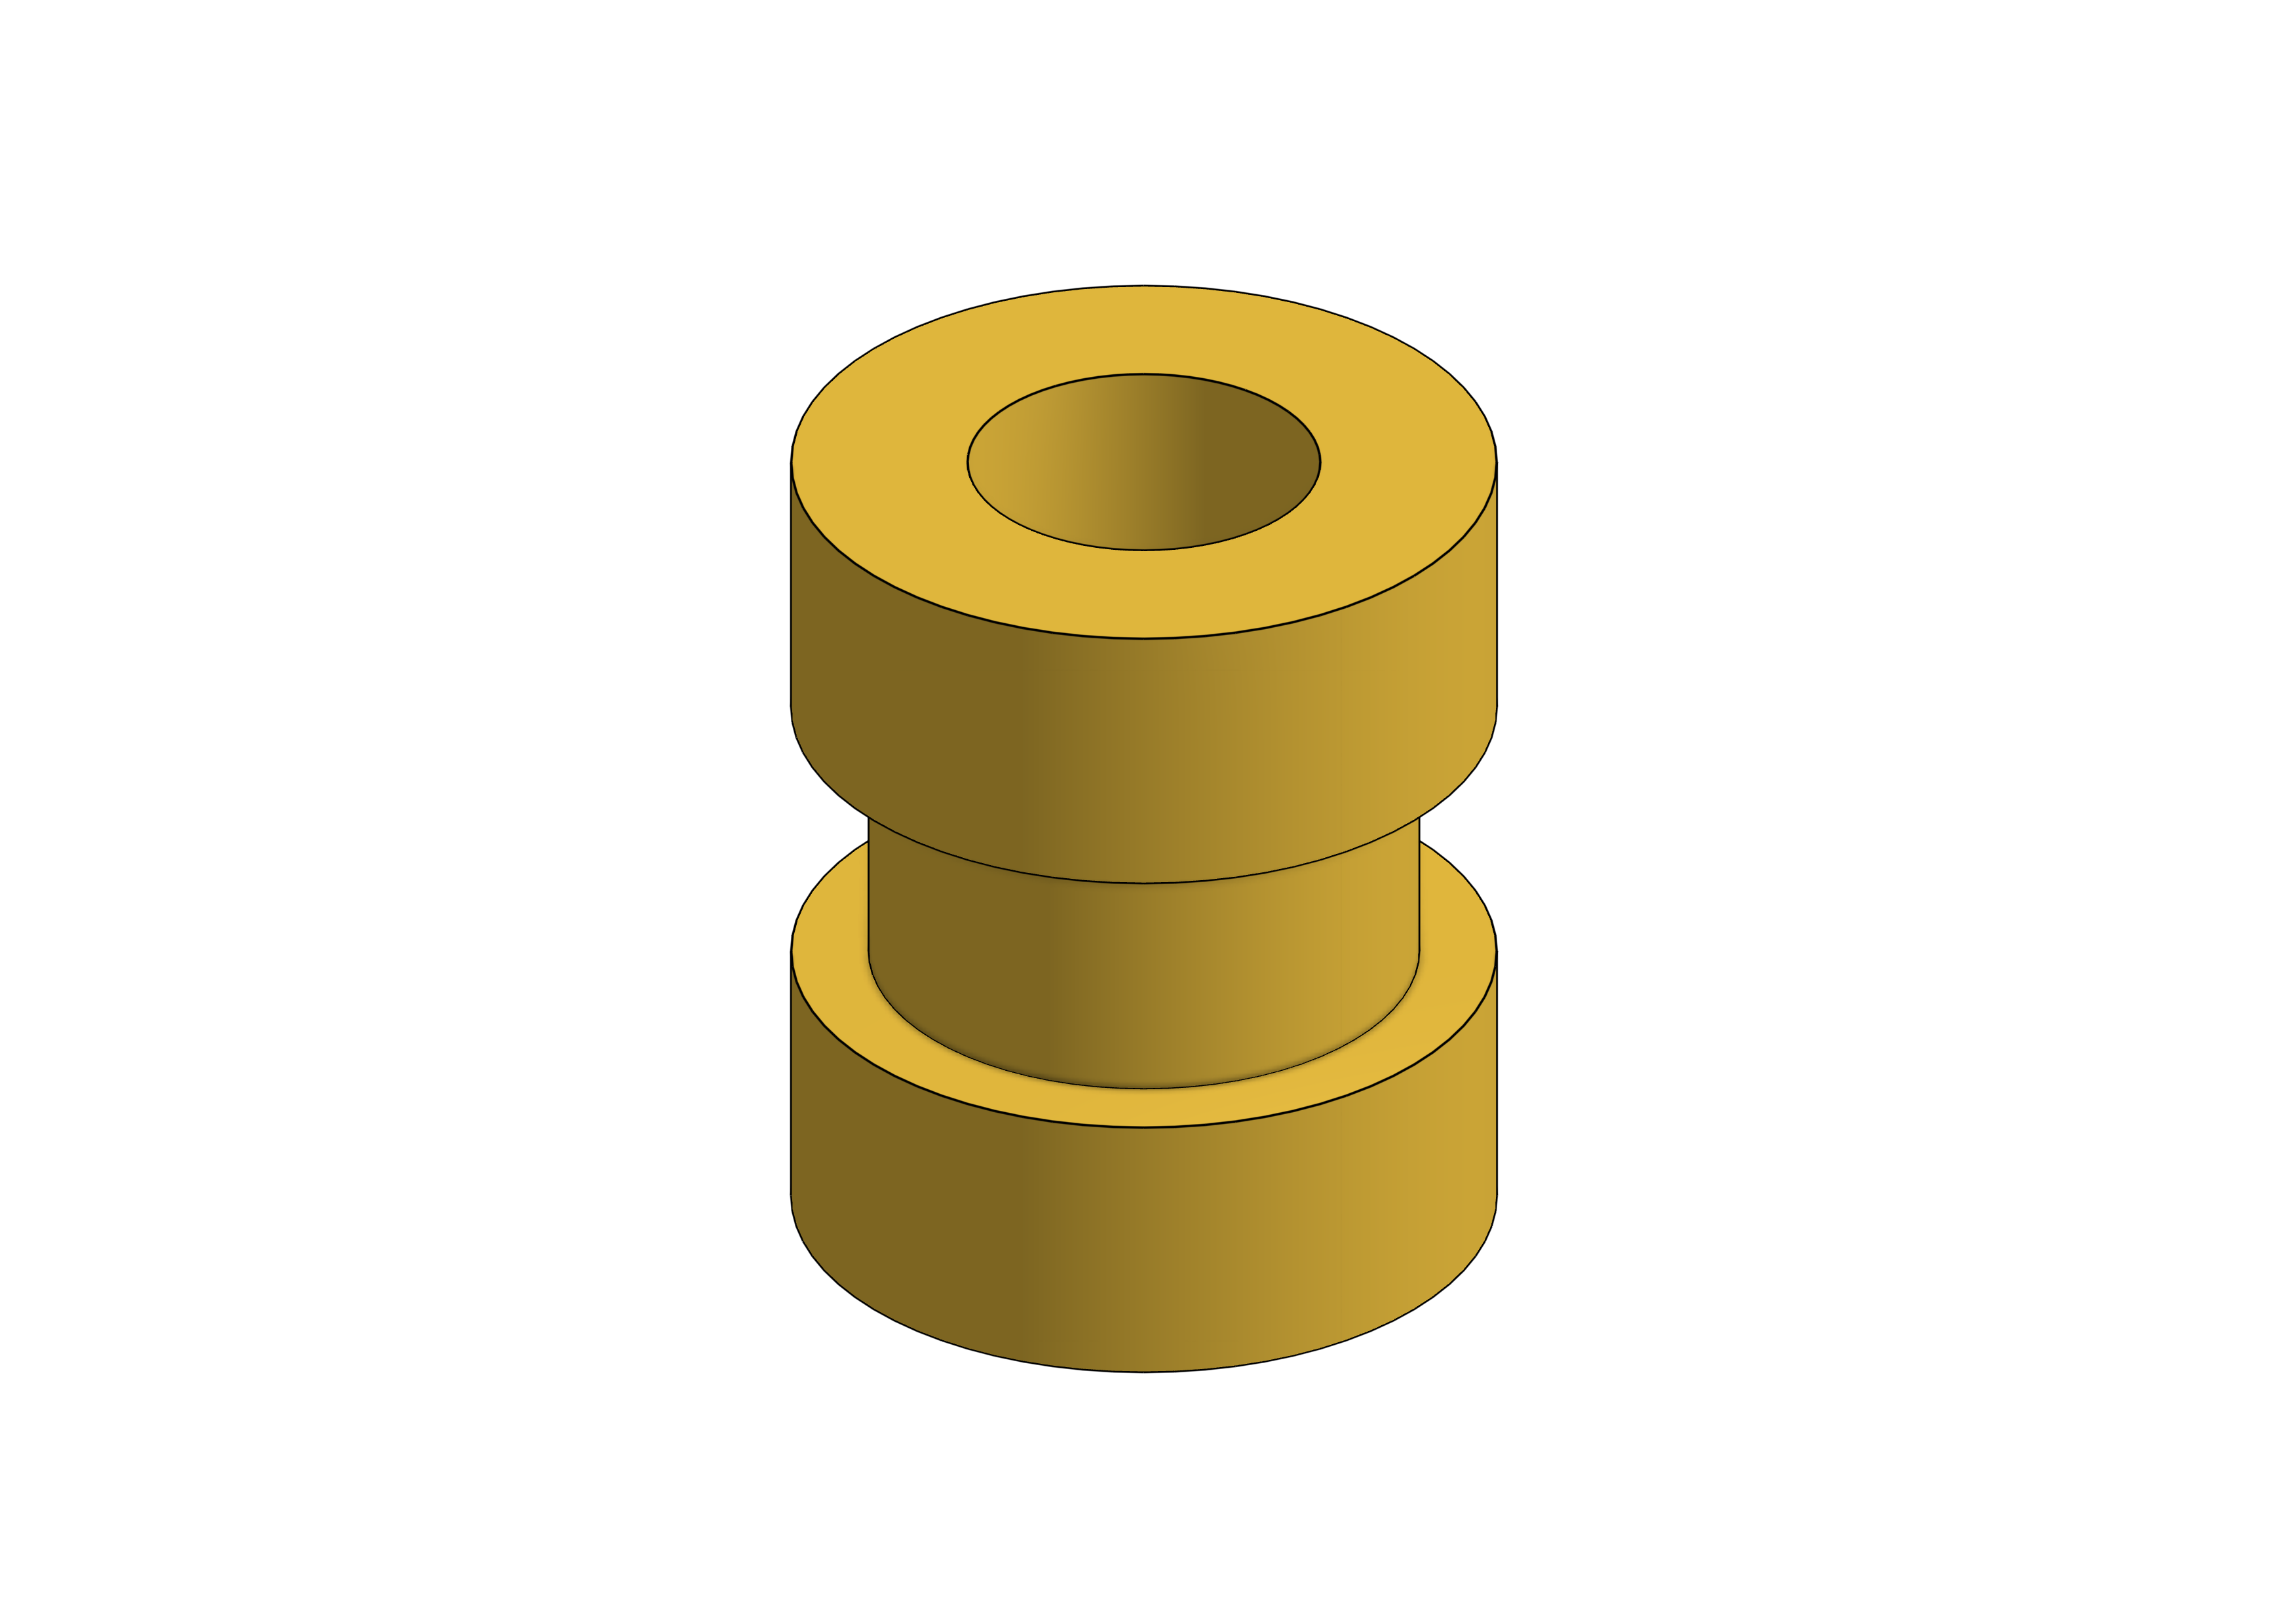
2x Knob
-
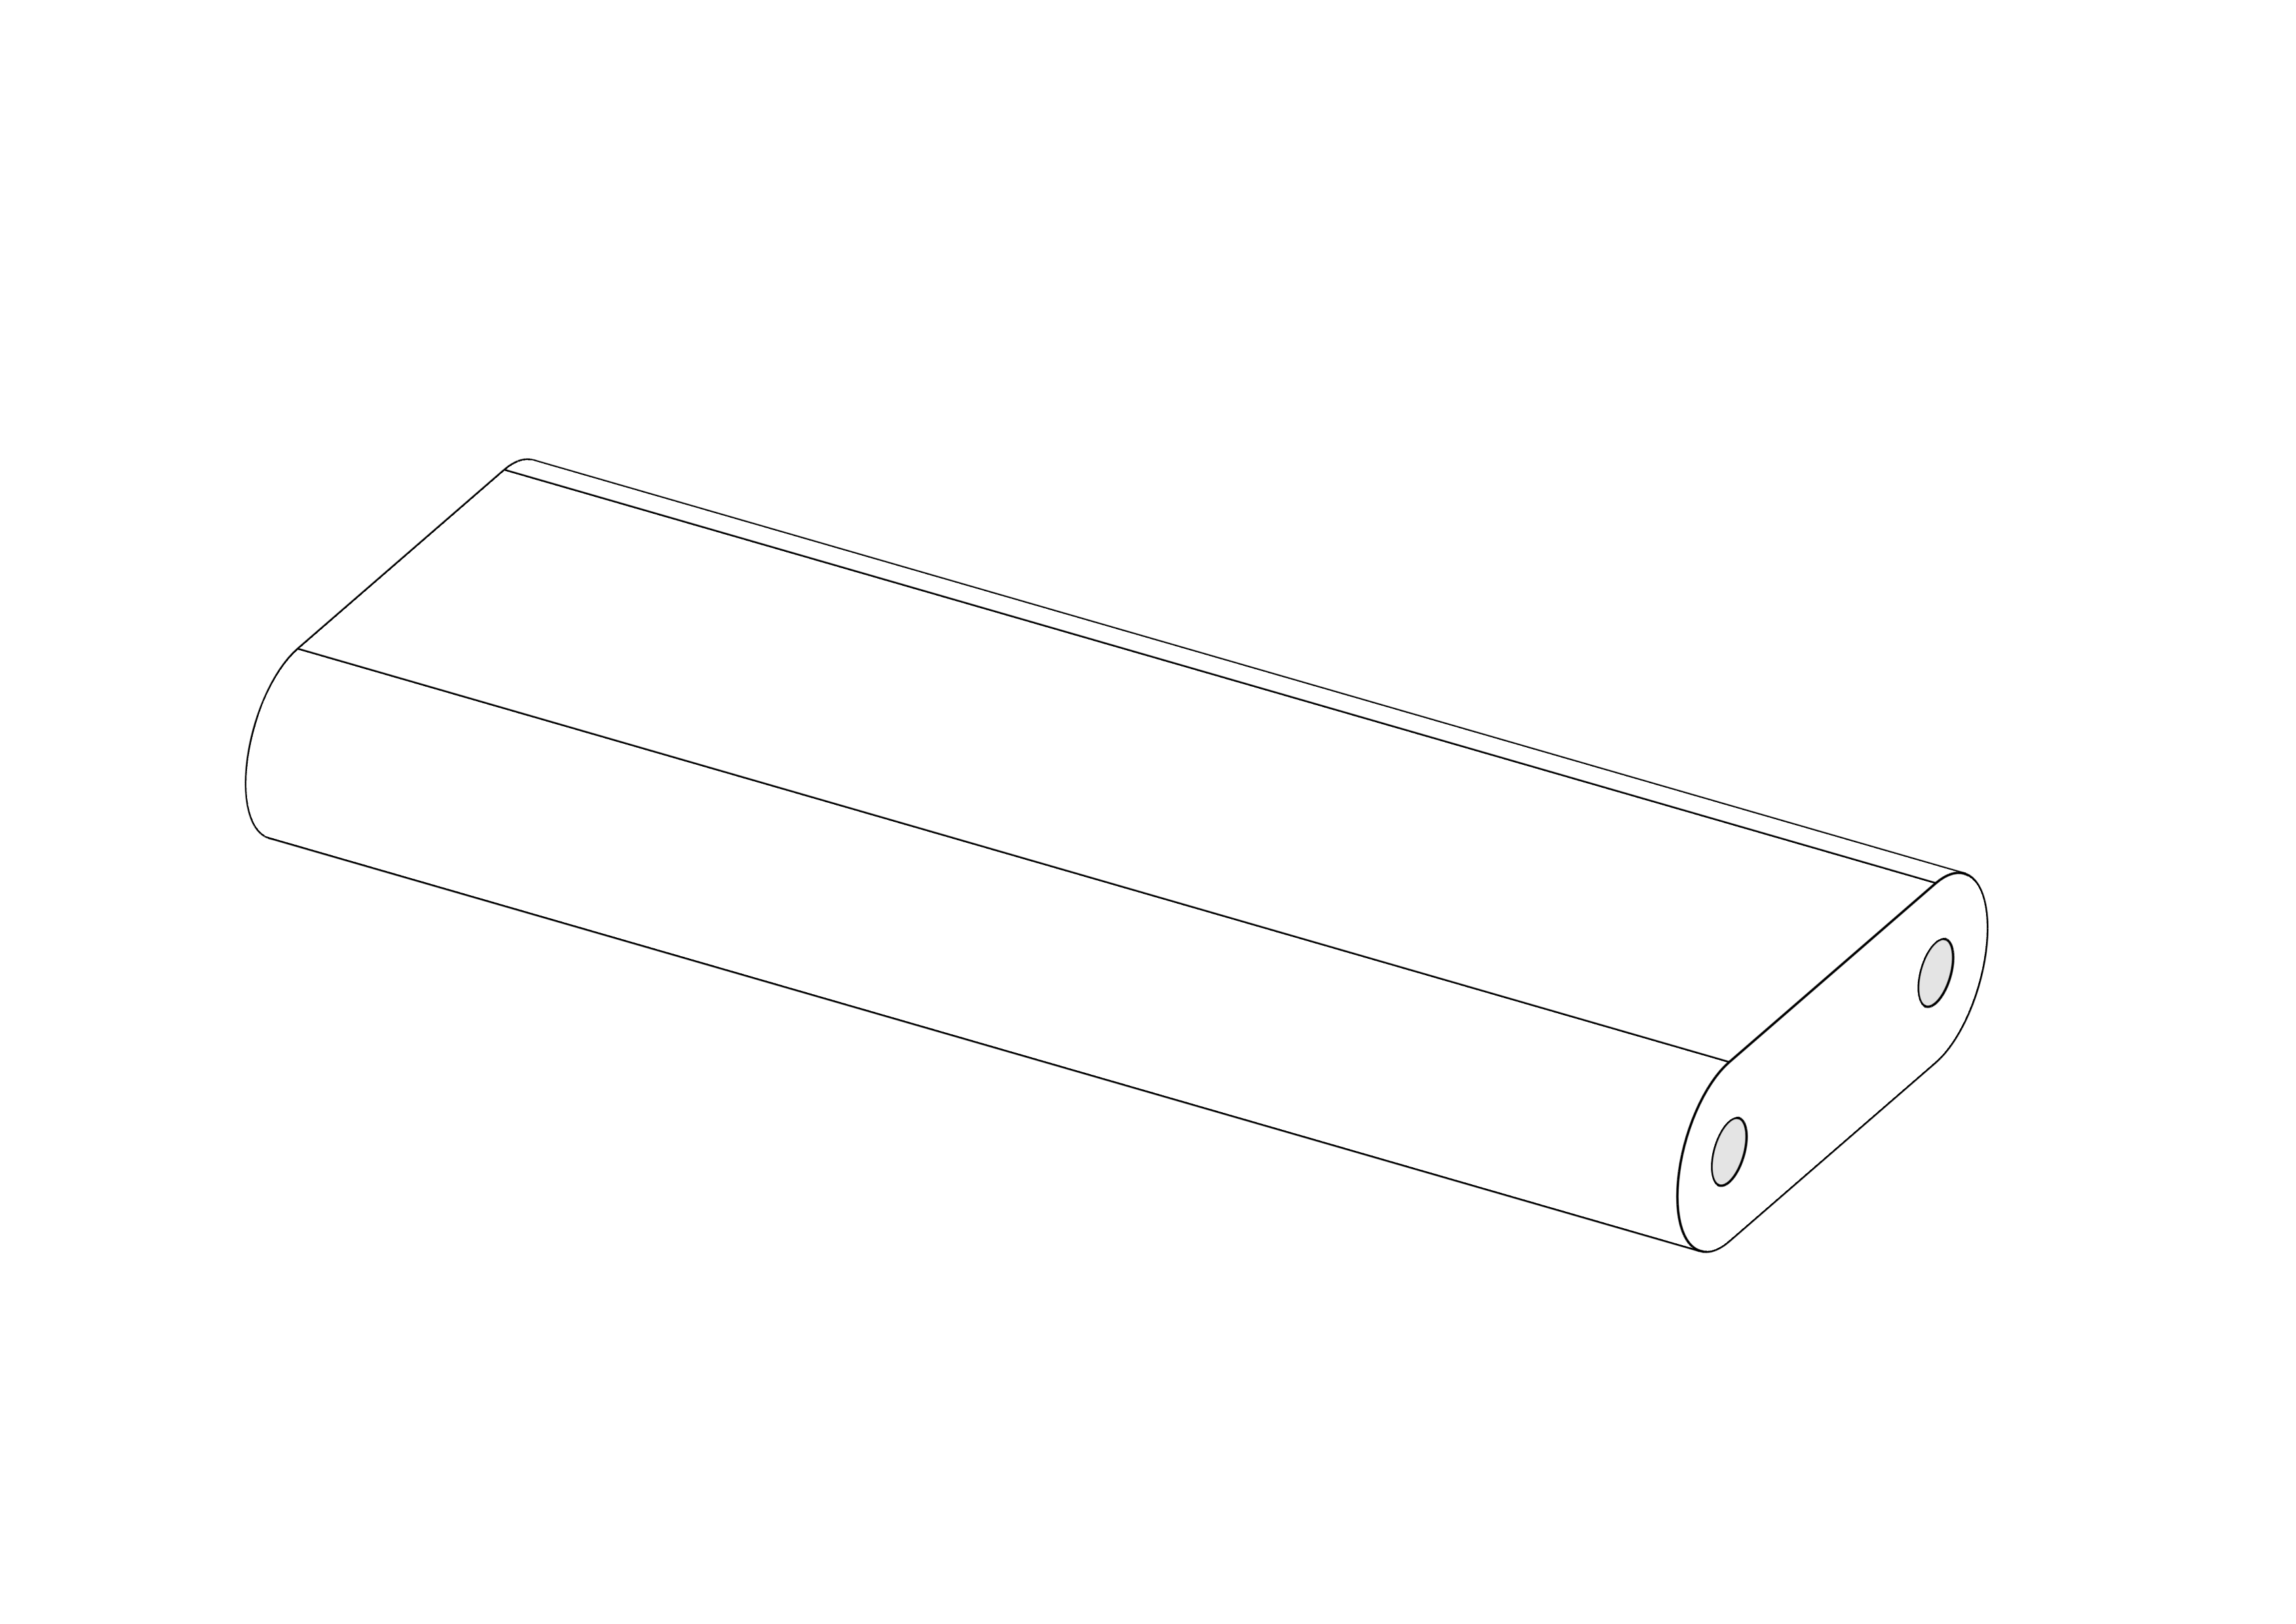
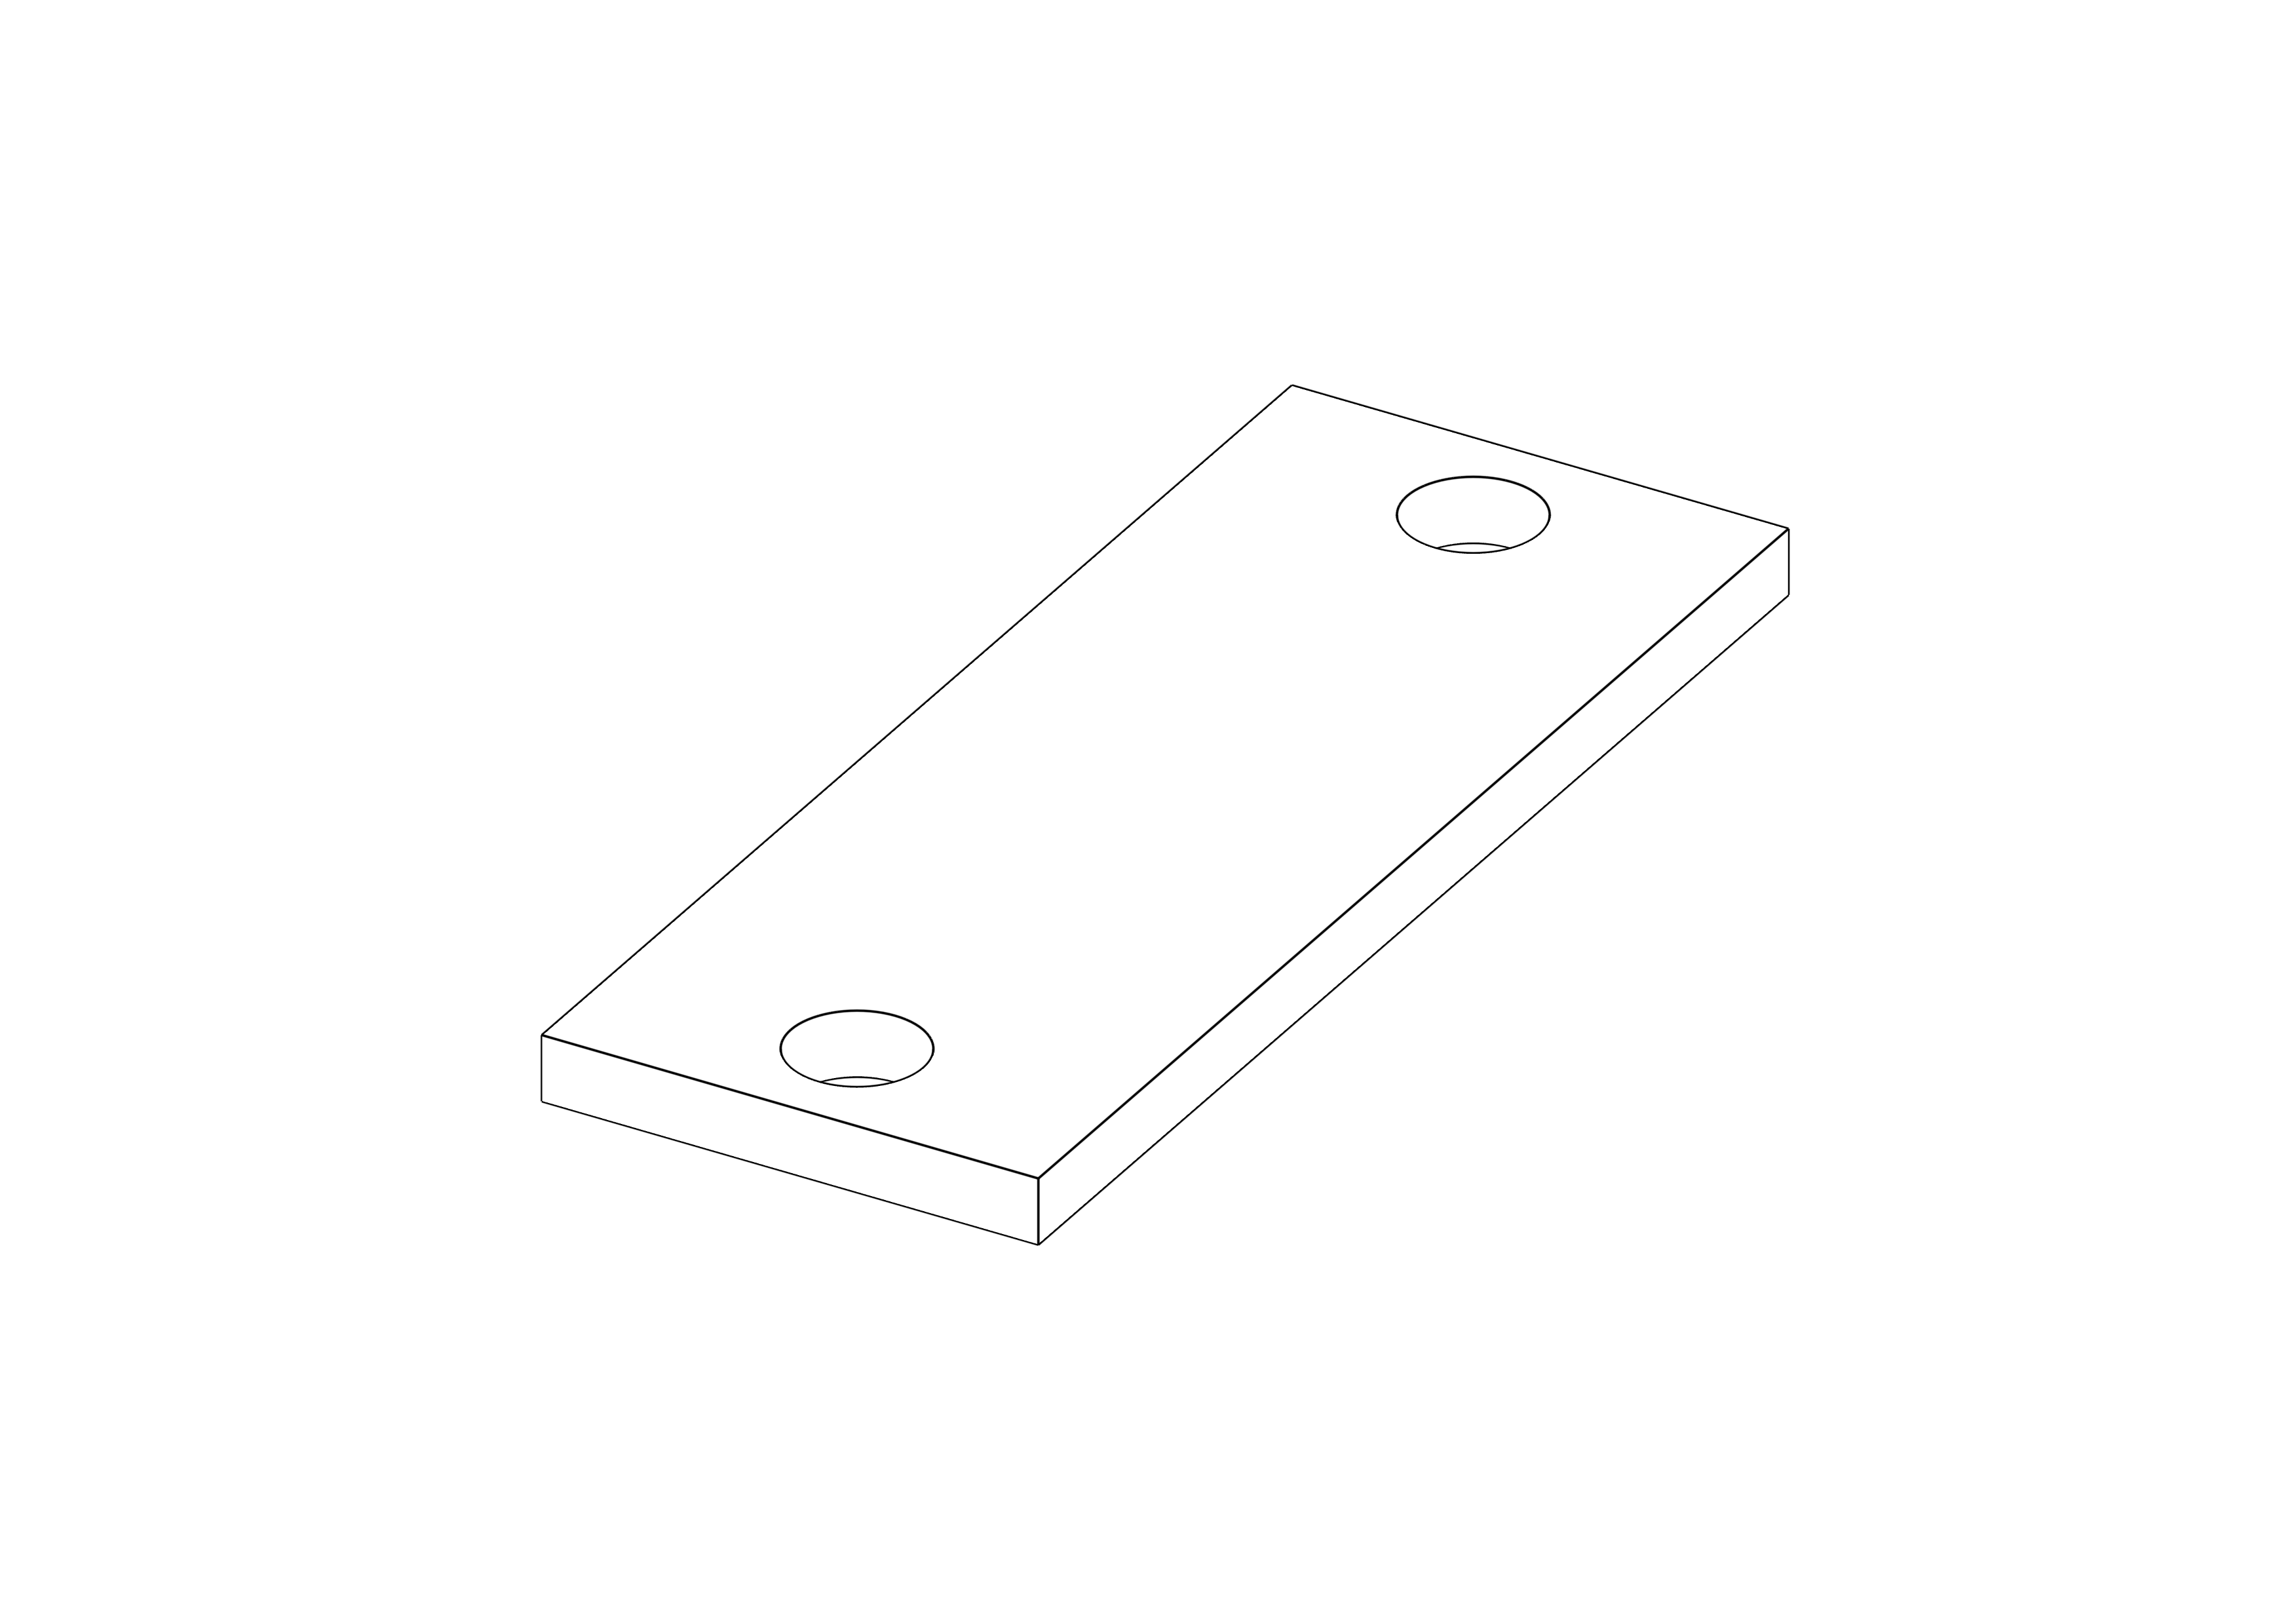
Two small pieces of wood or plastic as holding braces for the PCBs
that will be accessible from the outside (15 x 40mm two M3 trough holes)
-
Brass hotmelt inserts for screwing the front and back together and for the braces:
- 1 x M3x6
-
4 x M3x4
- 5x M3x10 Cap head screws
- Some self-tapping screws to attach the power switch.
- A piece of Copper wire to fit into the hinge to connect the front and back pieces
- Glue to glue the front and back plates into the bezels and some foam rubber strips or foam tape for securing stuff
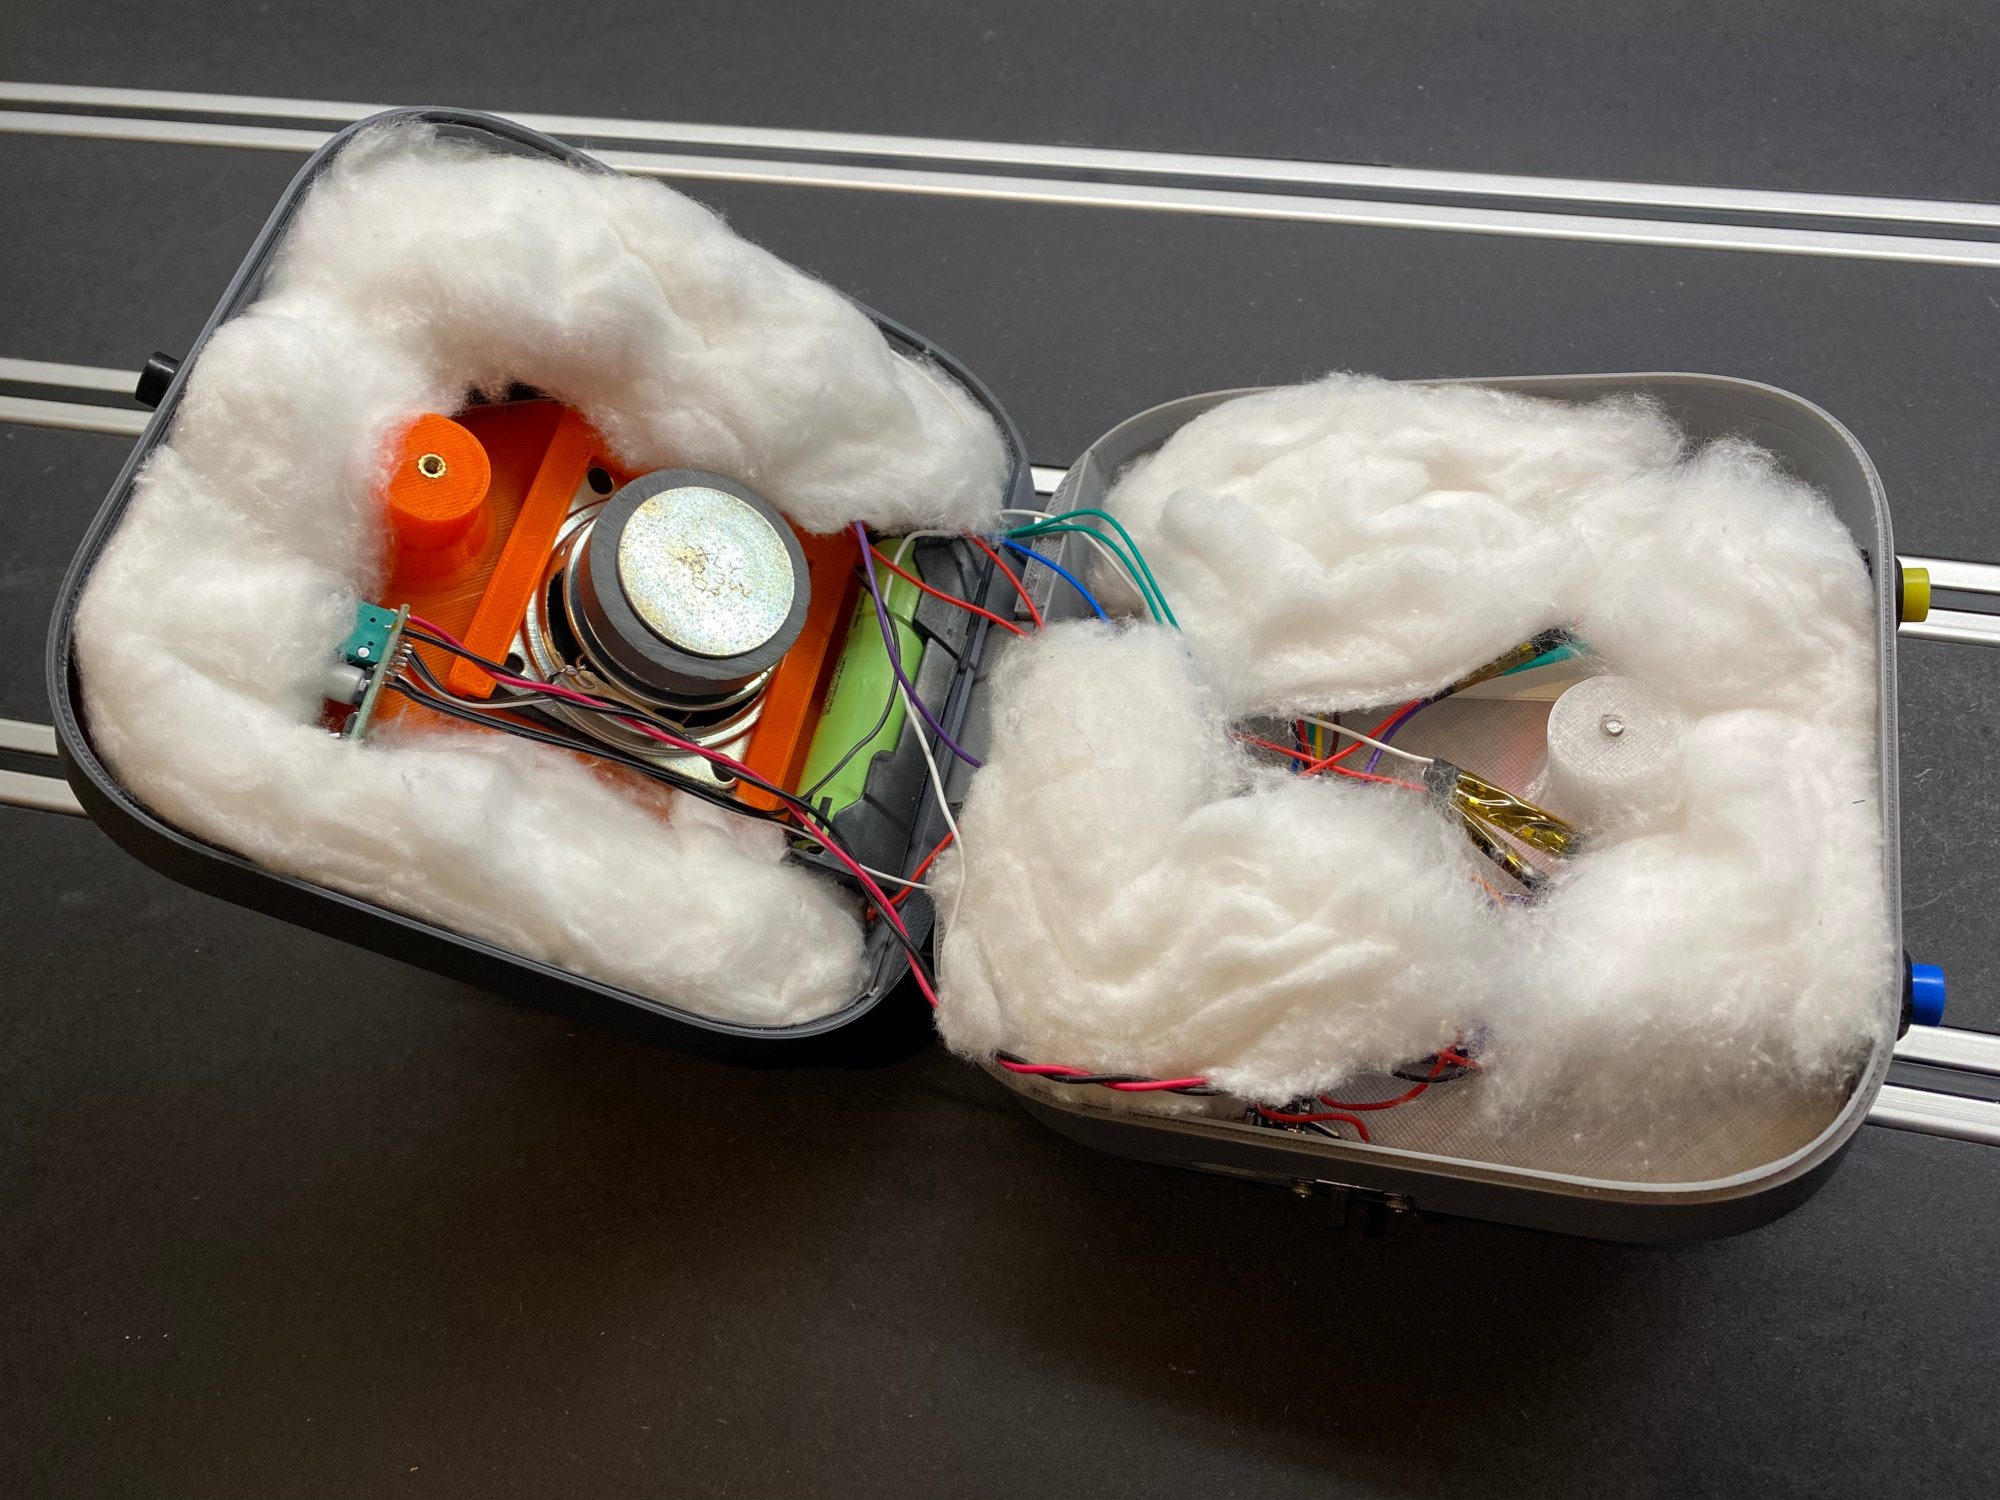
- Some wool or cotton to fill the empty spaces so no wires rattle around.
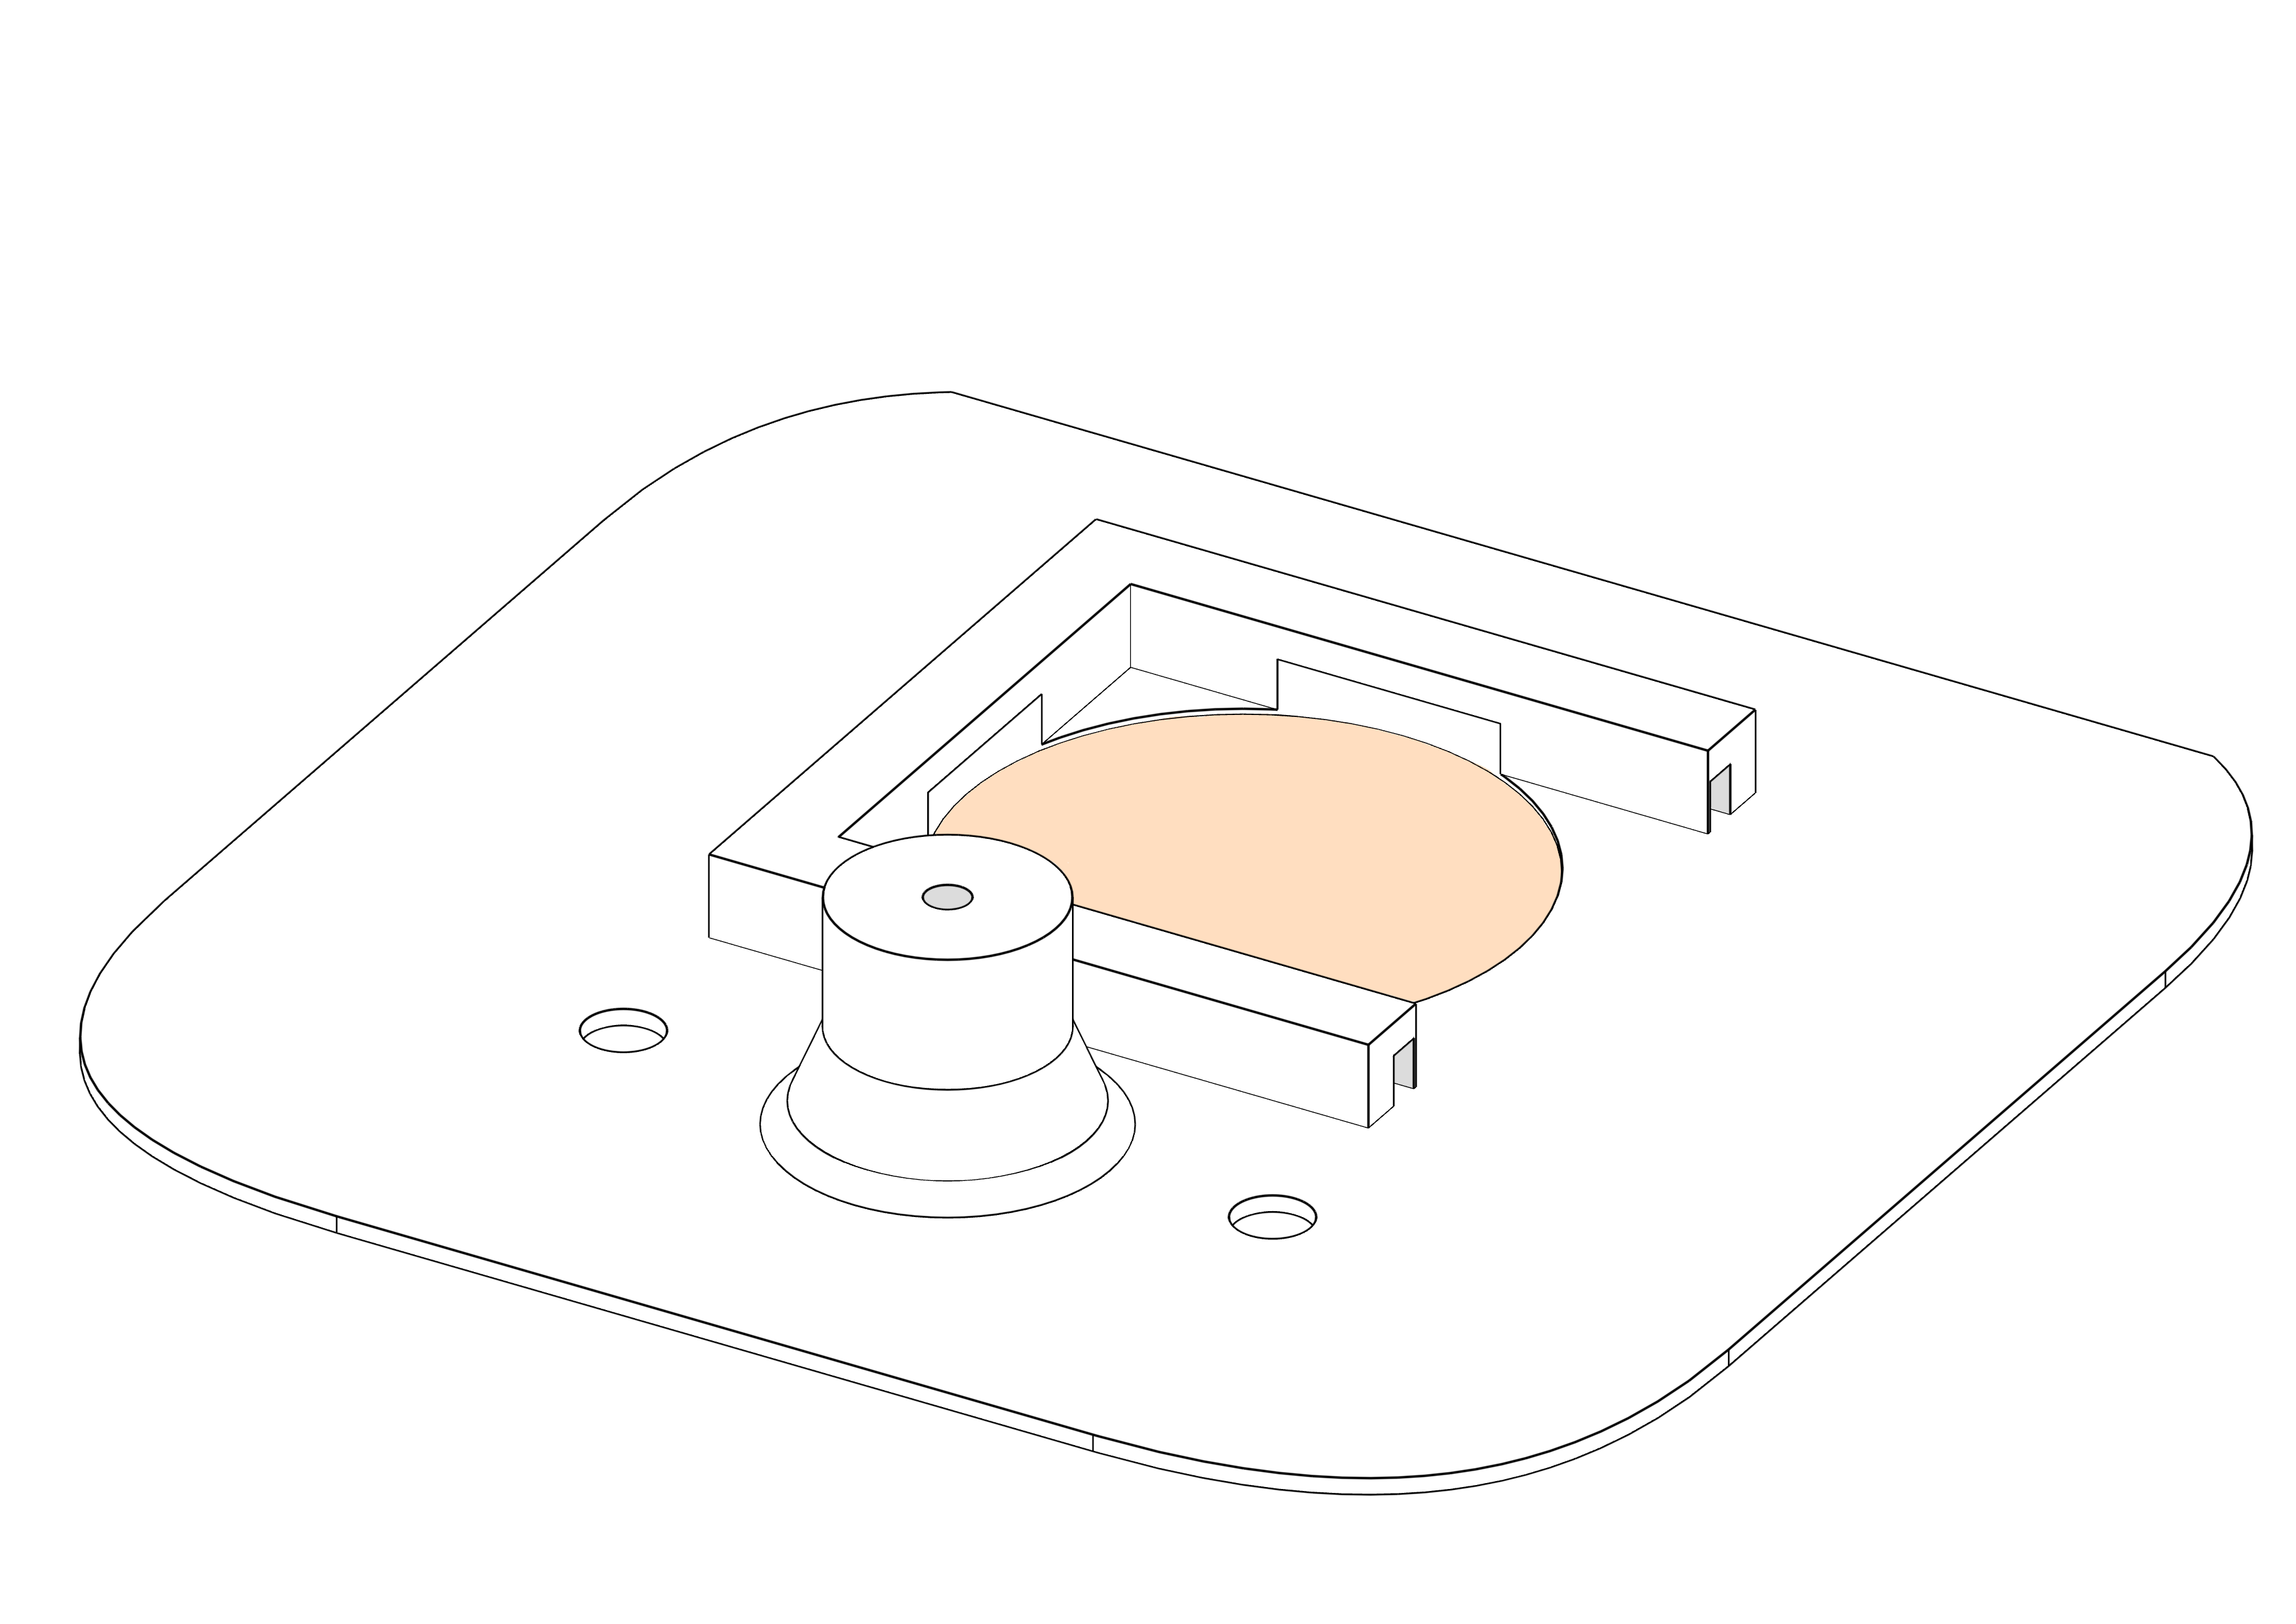
When printing the front plate make sure to change the settings for the speaker grille part to not print any bottom or top layers, use hexagon/honeycomb infill and use about 40% infill strength. You can remove the speaker grille part if you want to have the speaker open like you can see in the rendered graphic of the assembly.
After printing
- Remove the supports from the holding brackets of the speaker driver. There should be thin walled supports that have been designed into the part.
- Melt the inserts into the brace holes and the front plate.
- Glue the front and backplates into their bezels
- Find a piece of copper wire that fits into the holes in the hinge. The front and back bezels both have a small hole through which you can insert the wire through the hinge part. If assembled and the hinge is freely rotating you can use a small screw driver to bend the wire in the hole to avoid it falling out. Alternatively insert a dab of glue to close the hole.
- The SD card slot and USB-C port probably need some cleanup and filing to fit perfectly.
Electronics
The electronics in this devices are meant to be modular, so developer boards for all components were used and the wiring connections mostly have dupont connectors to be able to remove/replace a component without de-soldering anything. You can of course skip the connectors and solder everything together, that's your choice.
BOM
-
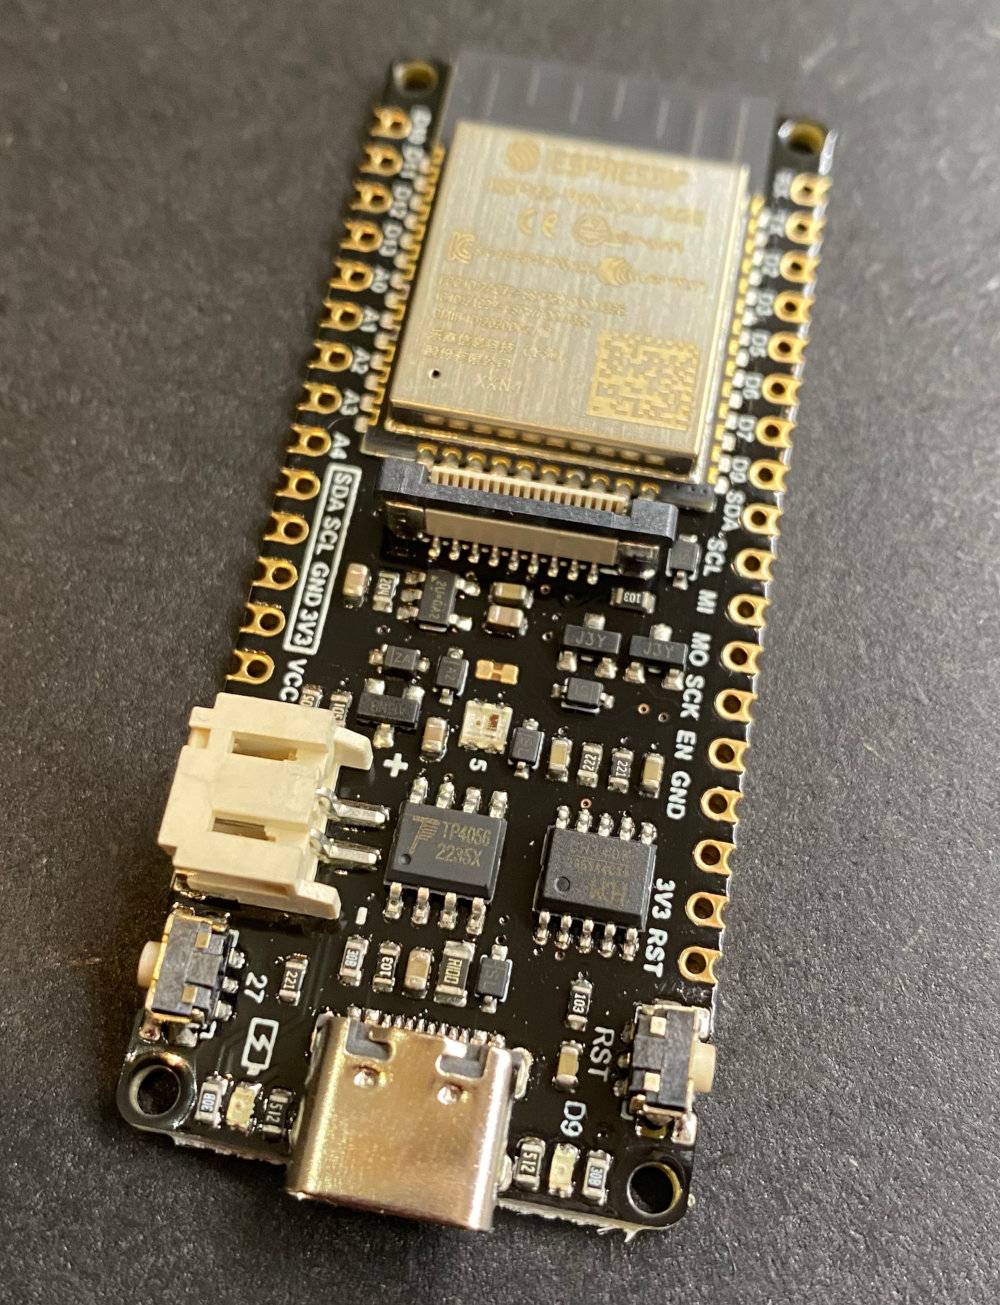
DFRobot Firebeetle 2 ESP32-E (ESP32 development board with battery charger and USB-C)
-
I2S DAC usually something like a
PCM5102A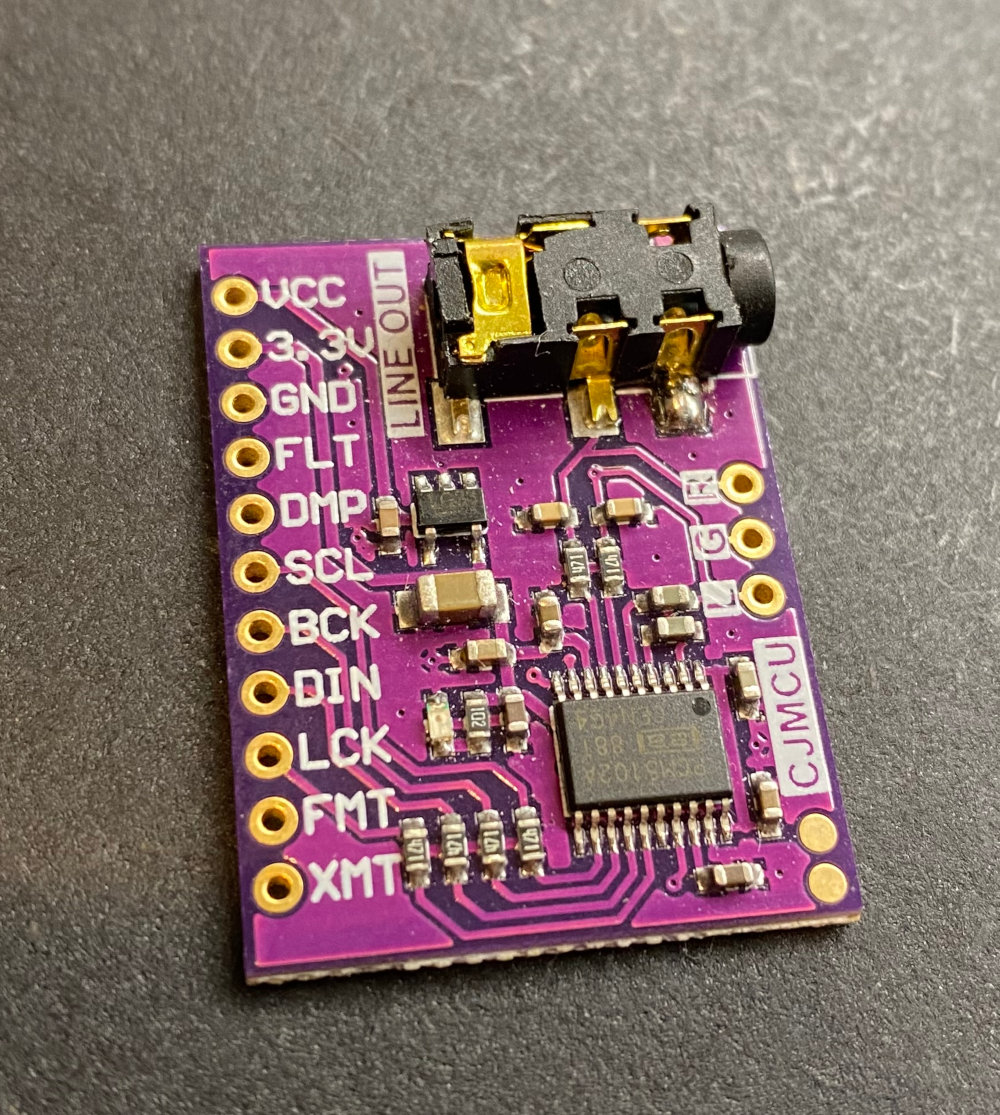
-
Micro SD Card reader, see below for more instructions!
-
Class D Amplifier for 1.5W to 4W with volume regulation, for example
PAM8403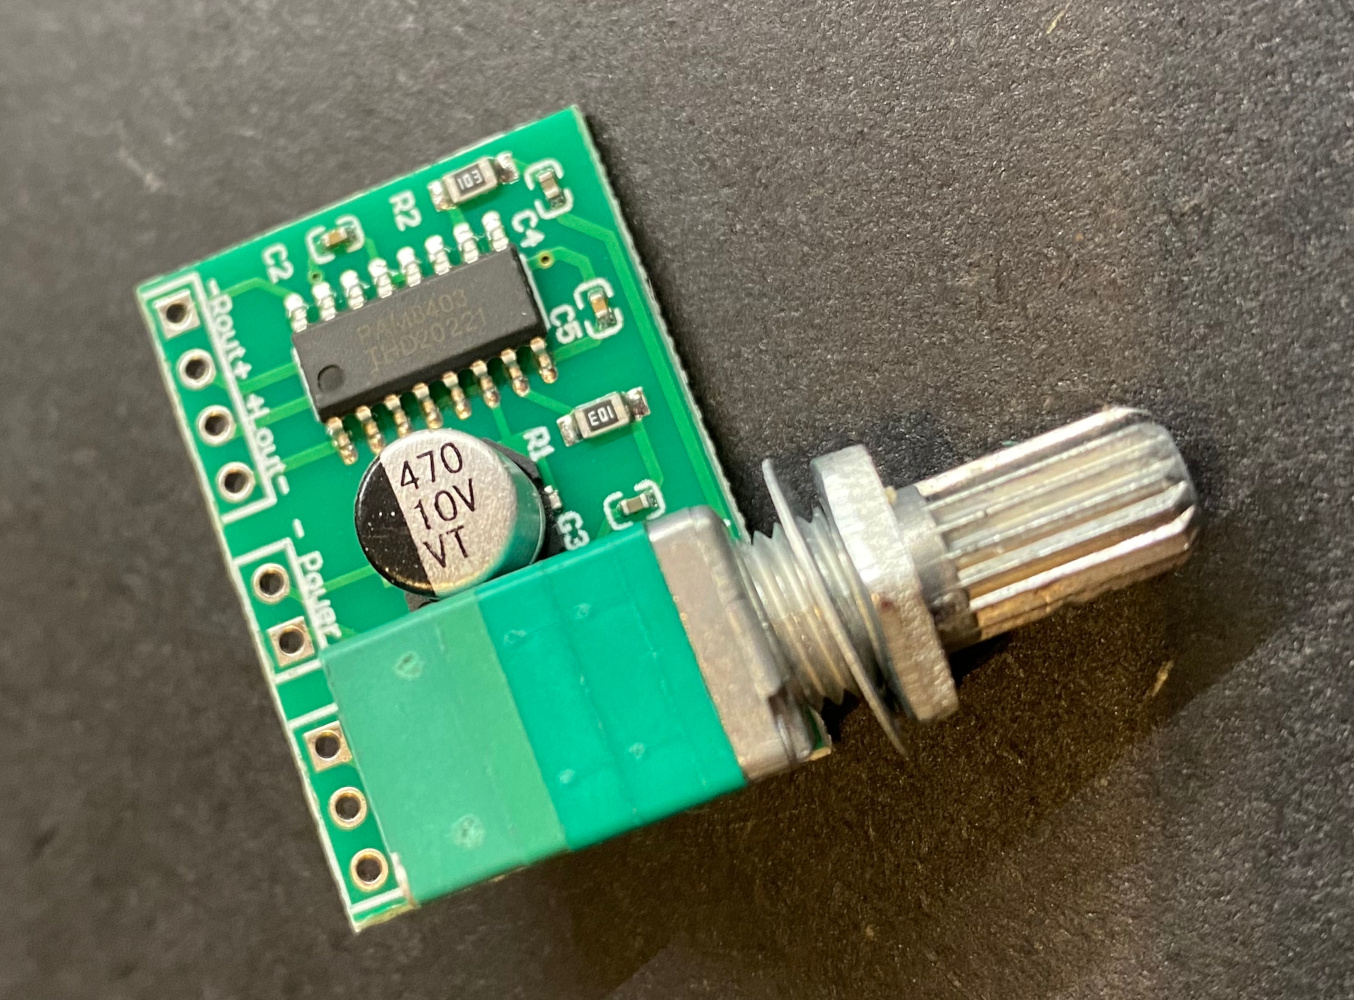
-
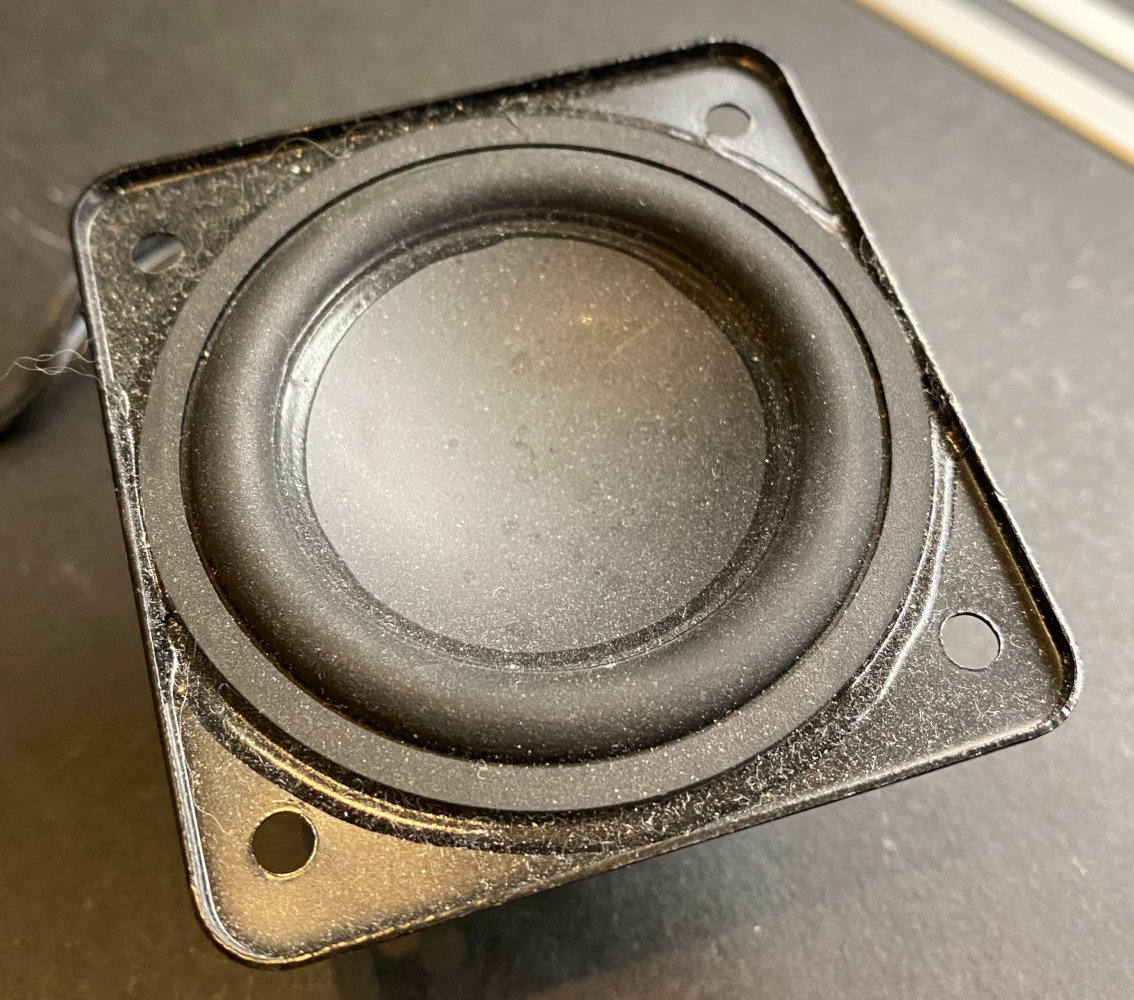
"57mm Speaker" (yes this is the search term). You can probably use any speaker you
want as long as it is 4-8 Ohms and can work with your amplifier.
-
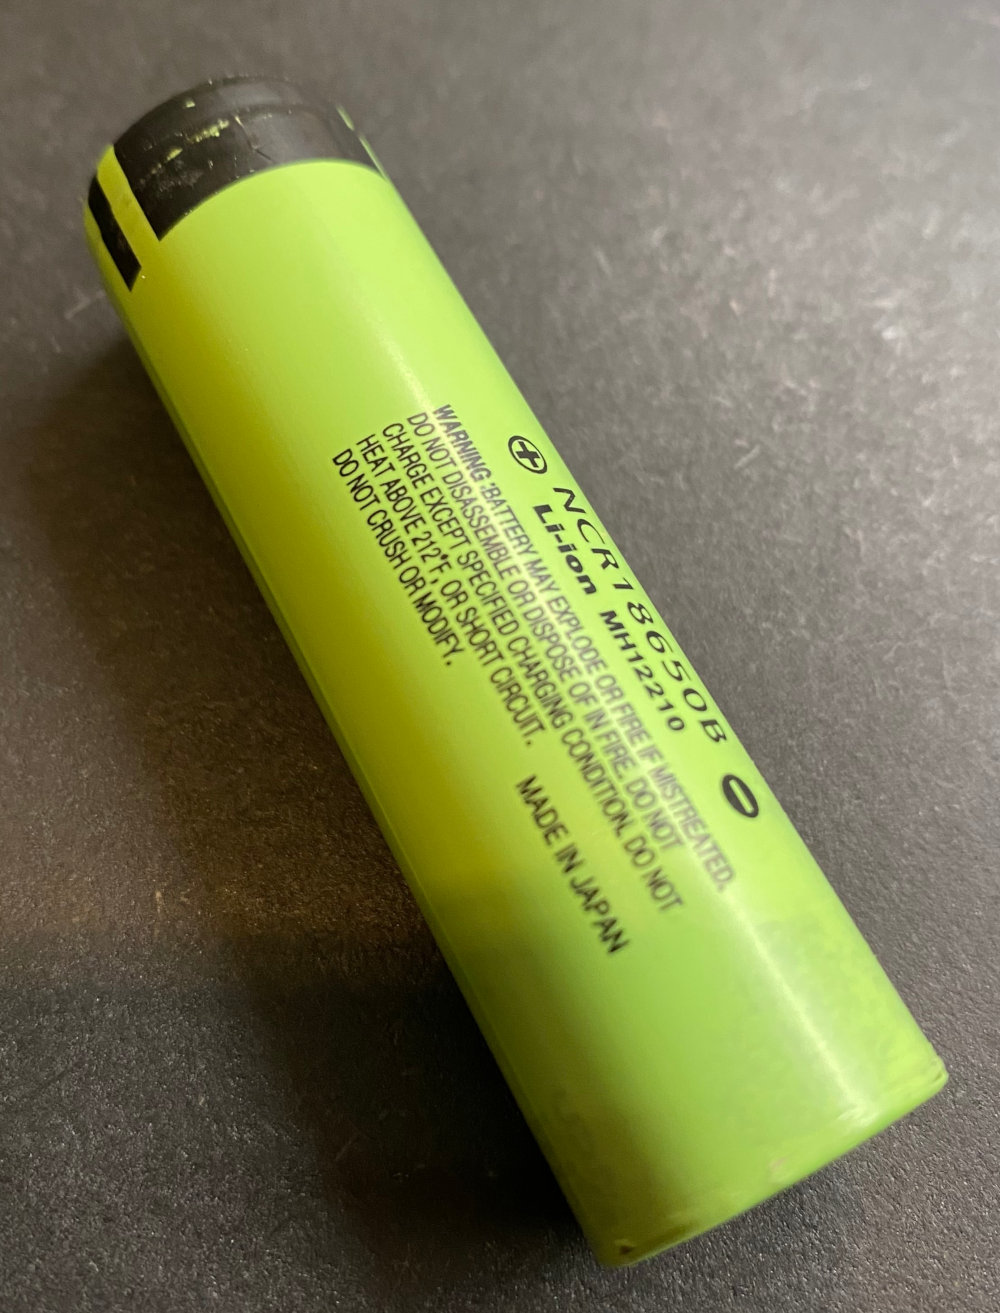
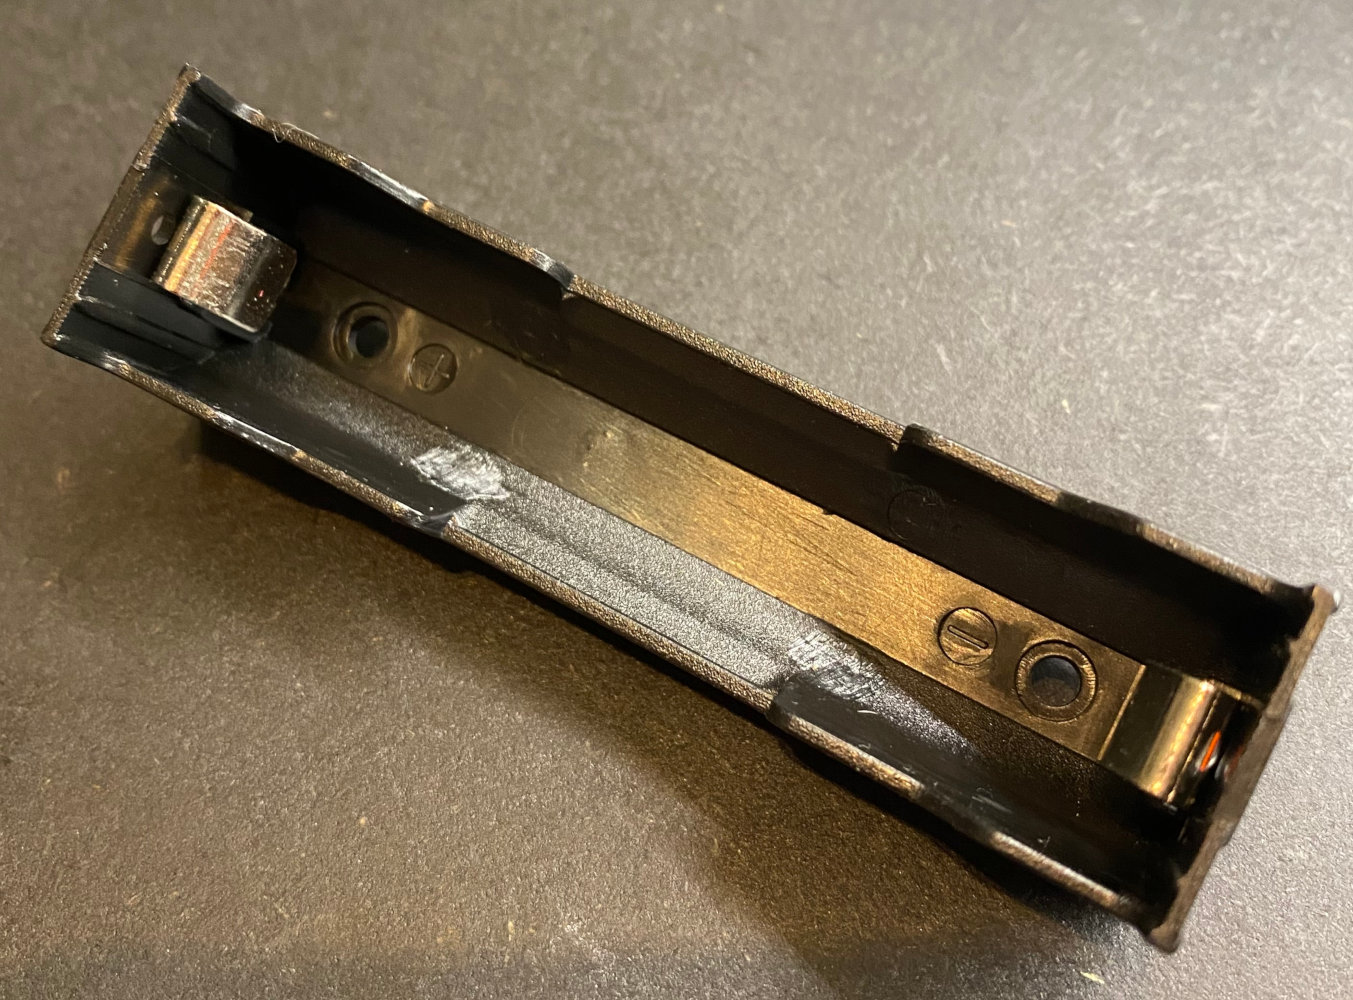
LiIon 18650 Battery
-
Battery holder
-
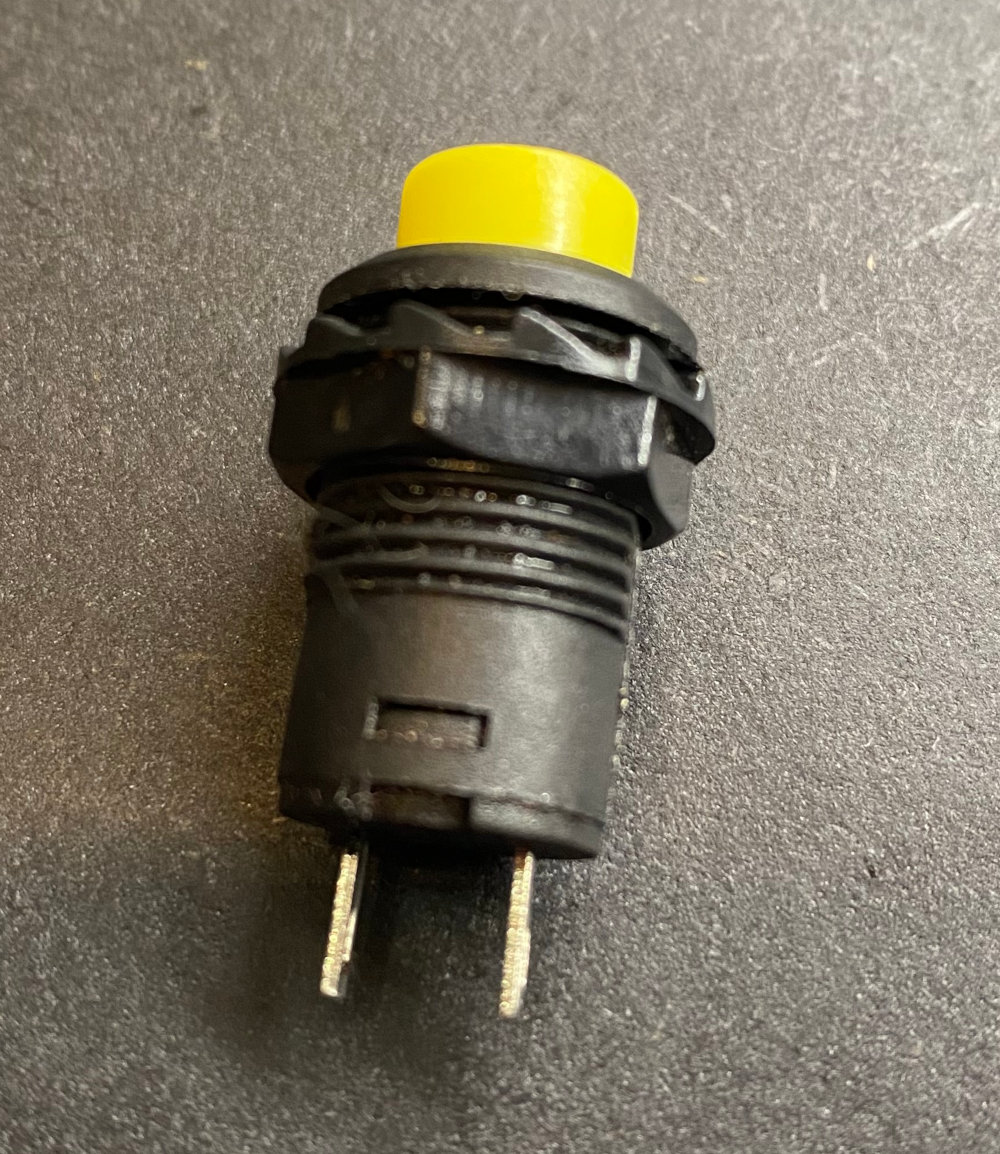
3x Round pushbutton. If you cannot find these, you probably can use others if you
have some patience and a file for the holes ;)
-
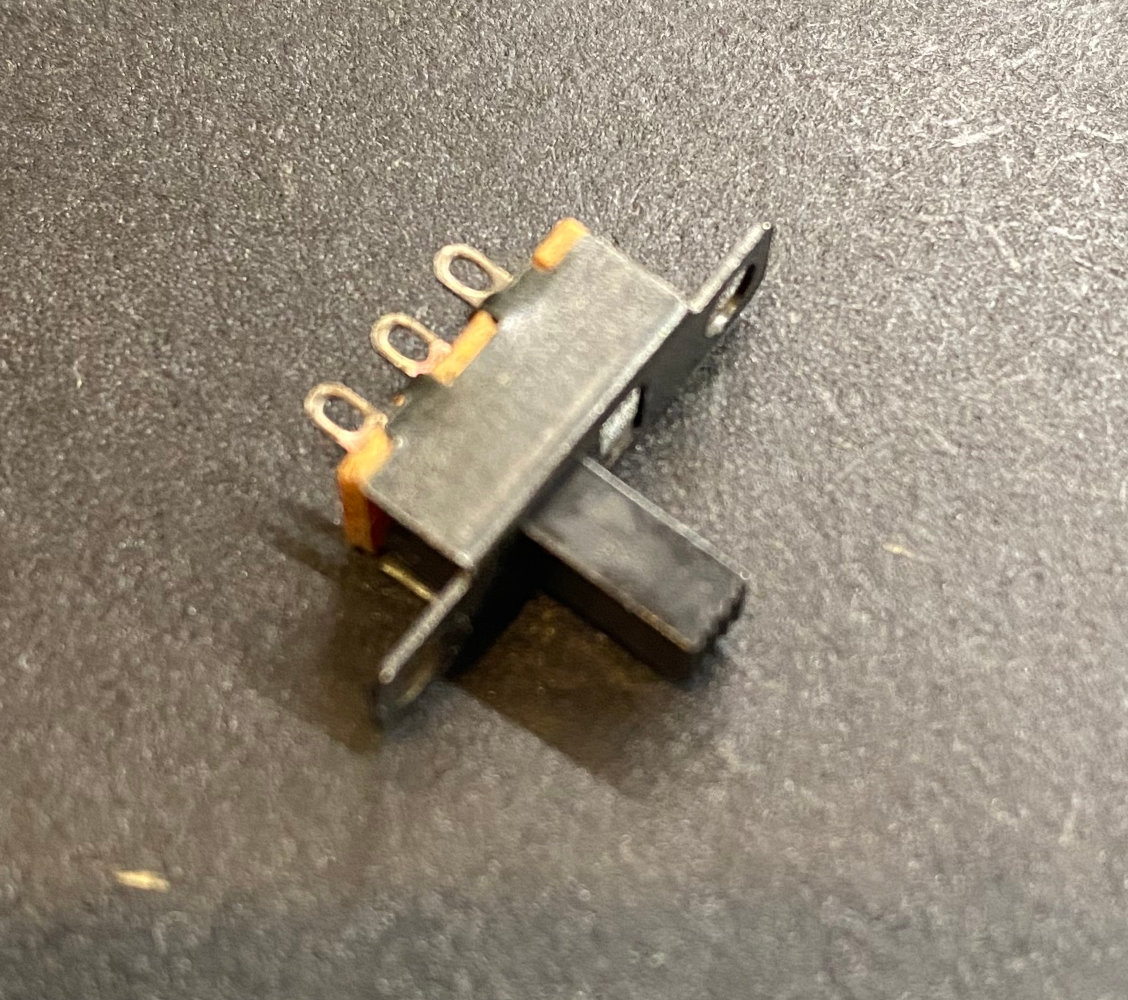
Sliding switch for power
-
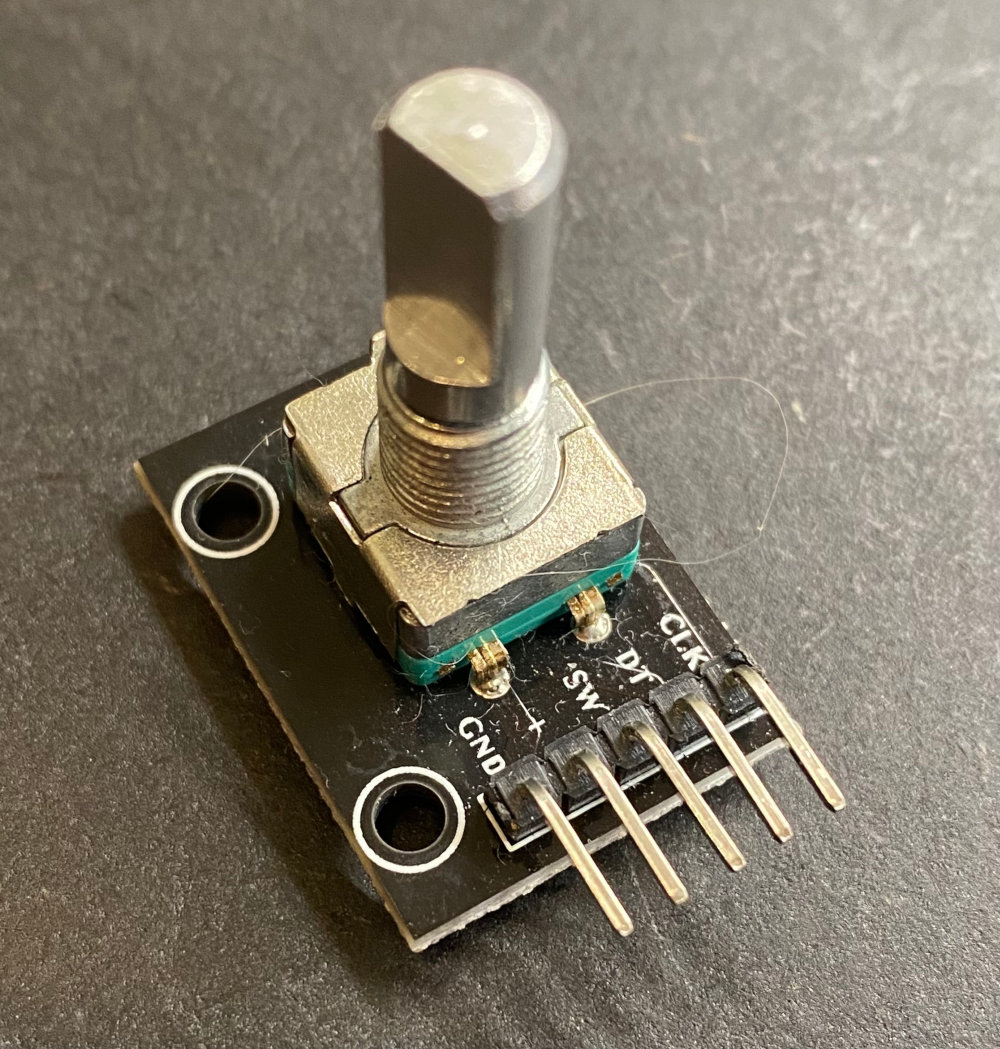
Encoder with pullups, you can get modules that have pullups integrated, if you
have no pullups integrated you can integrate resistors in your wiring.
Attention: this is not a potientometer but a gray encoder!
- 3 x 1kOhm resistor as pull up for the buttons
- Some multi colored wires, a soldering Iron and patience
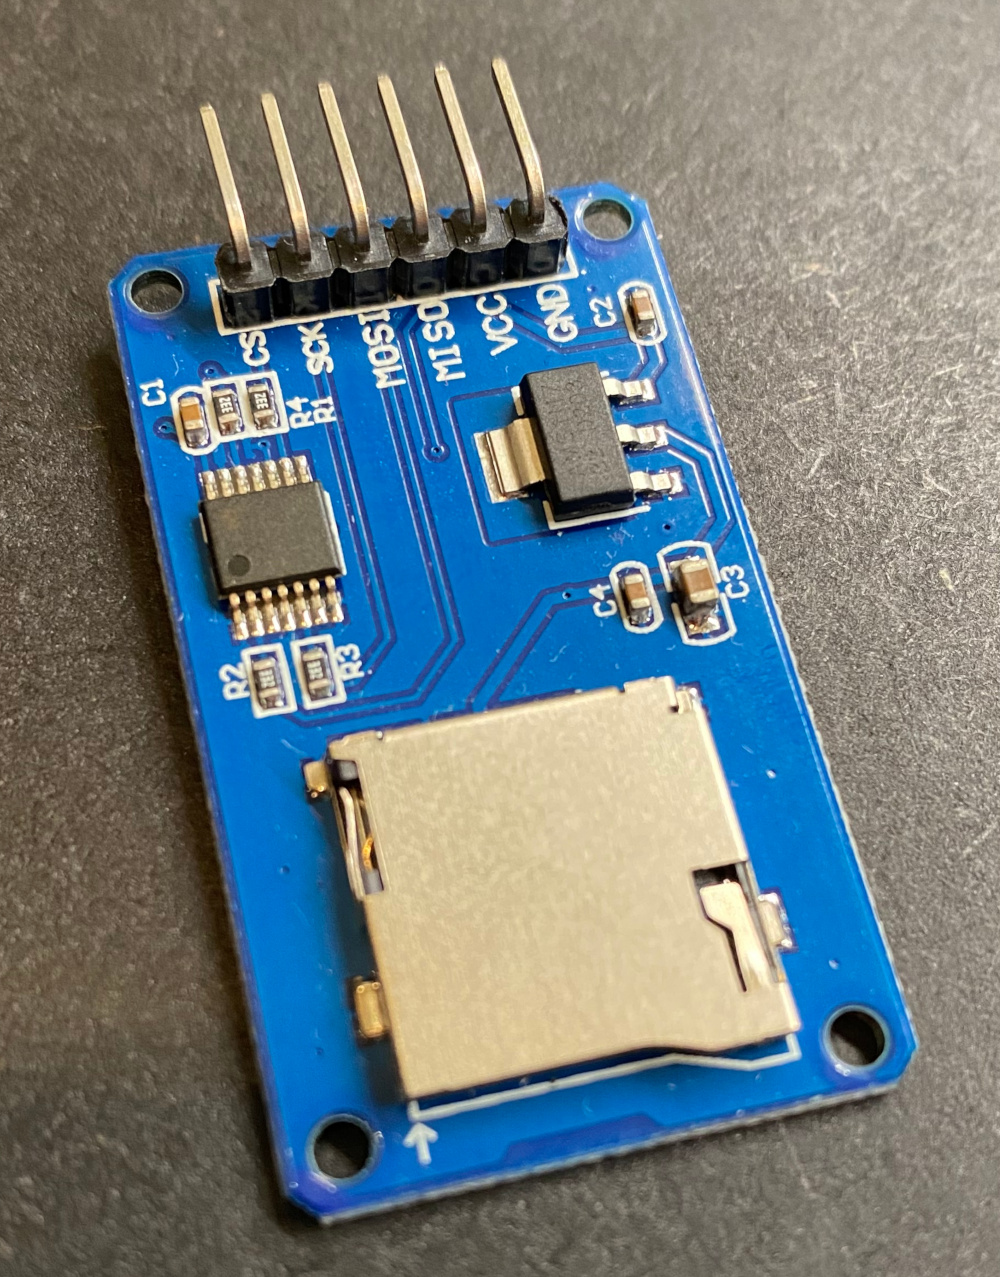
SD-Card reader:
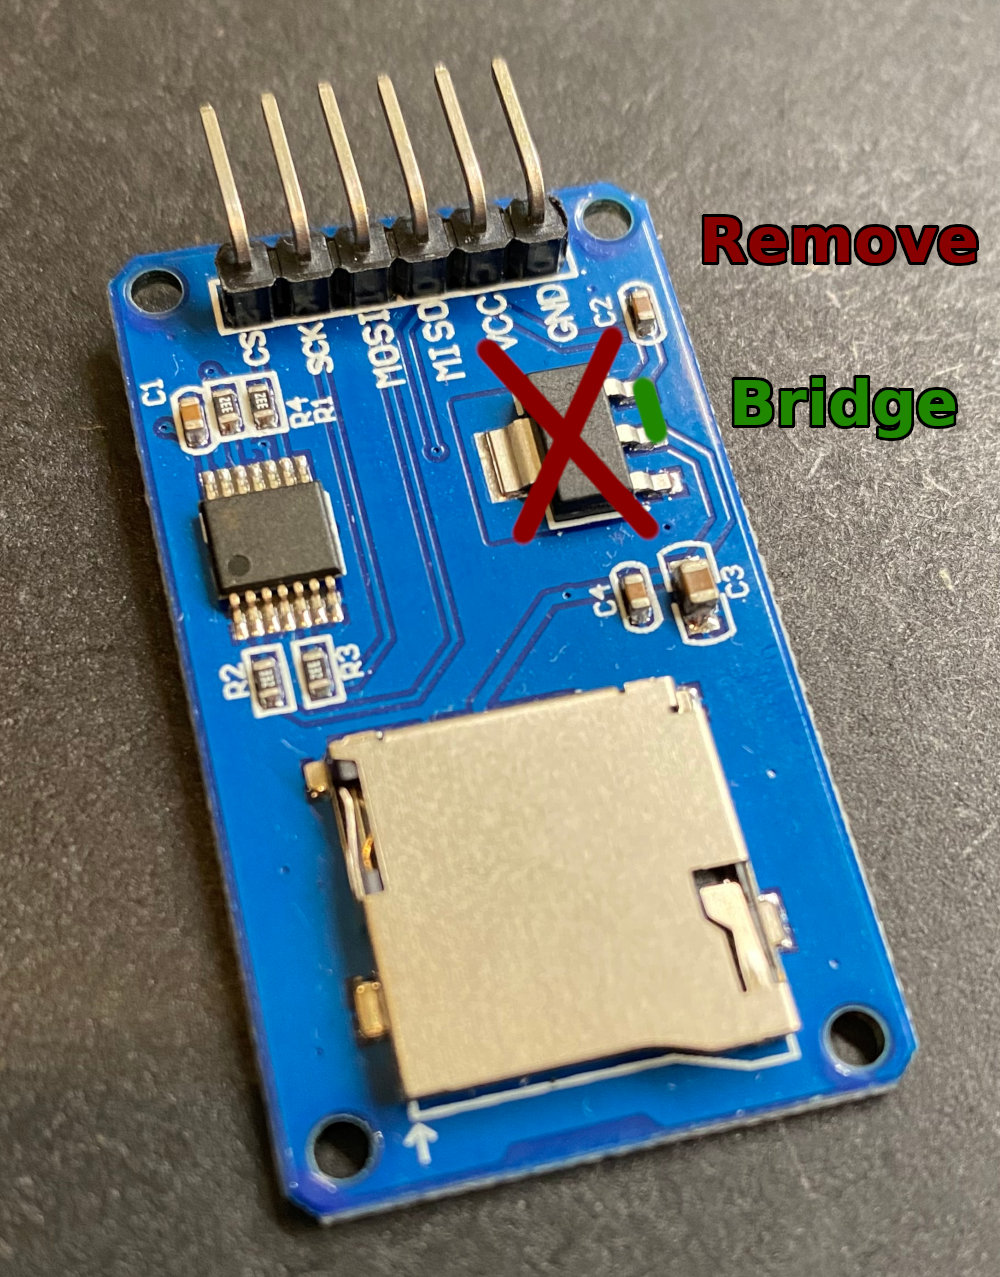
Get a reader that has the Card slot as close to the edge as possible, if it is not at the edge you can usually file away some of the FR4 board to make it fit. (Usually there are no traces there to destroy...).
Most SD-Card readers you can get on the market are designed to be used with 5V electronics and contain a linear regulator (red X) to step down that voltage to 3.3V. As the ESP32 works on 3.3V already you'll have to remove that LDO because the minimal voltage it needs to run is usually 4.5V. When removing the part either use hot air or just a soldering iron and cook that thing, as we won't be needing it you do not have to save it. After removal just bridge input and output of the part (marked in green).
Wiring
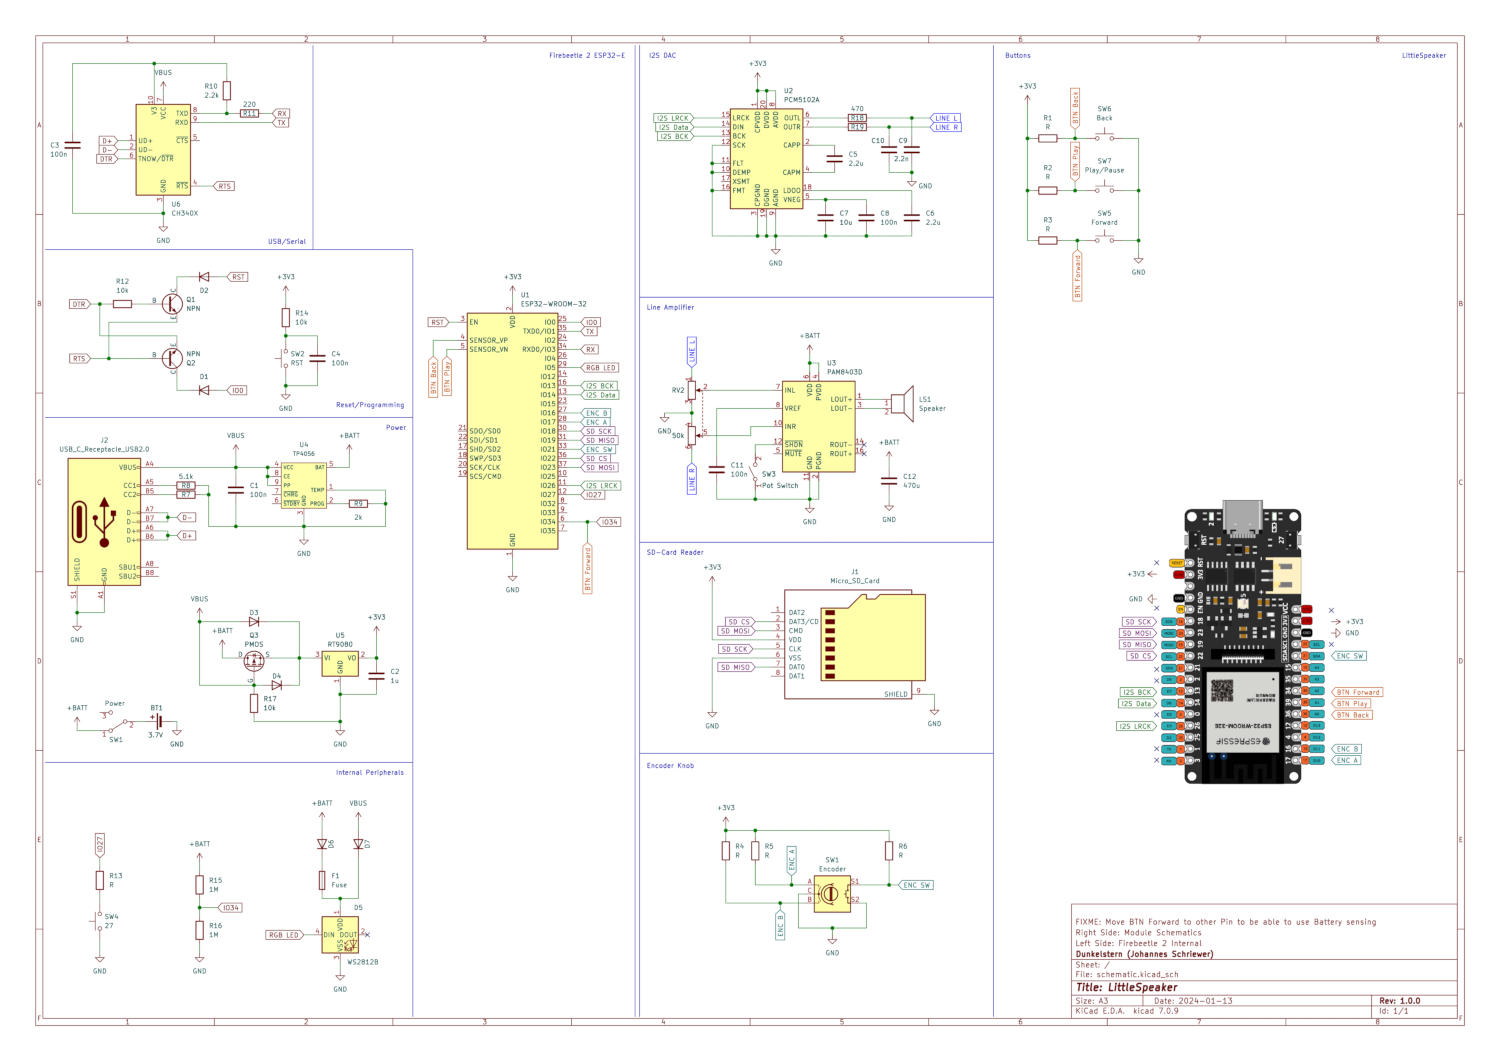
Make sure to connect the Amplifier directly to the battery and not the ESP32. You will crash the ESP with loud music as the regulator on the PCB will not deliver enough power!
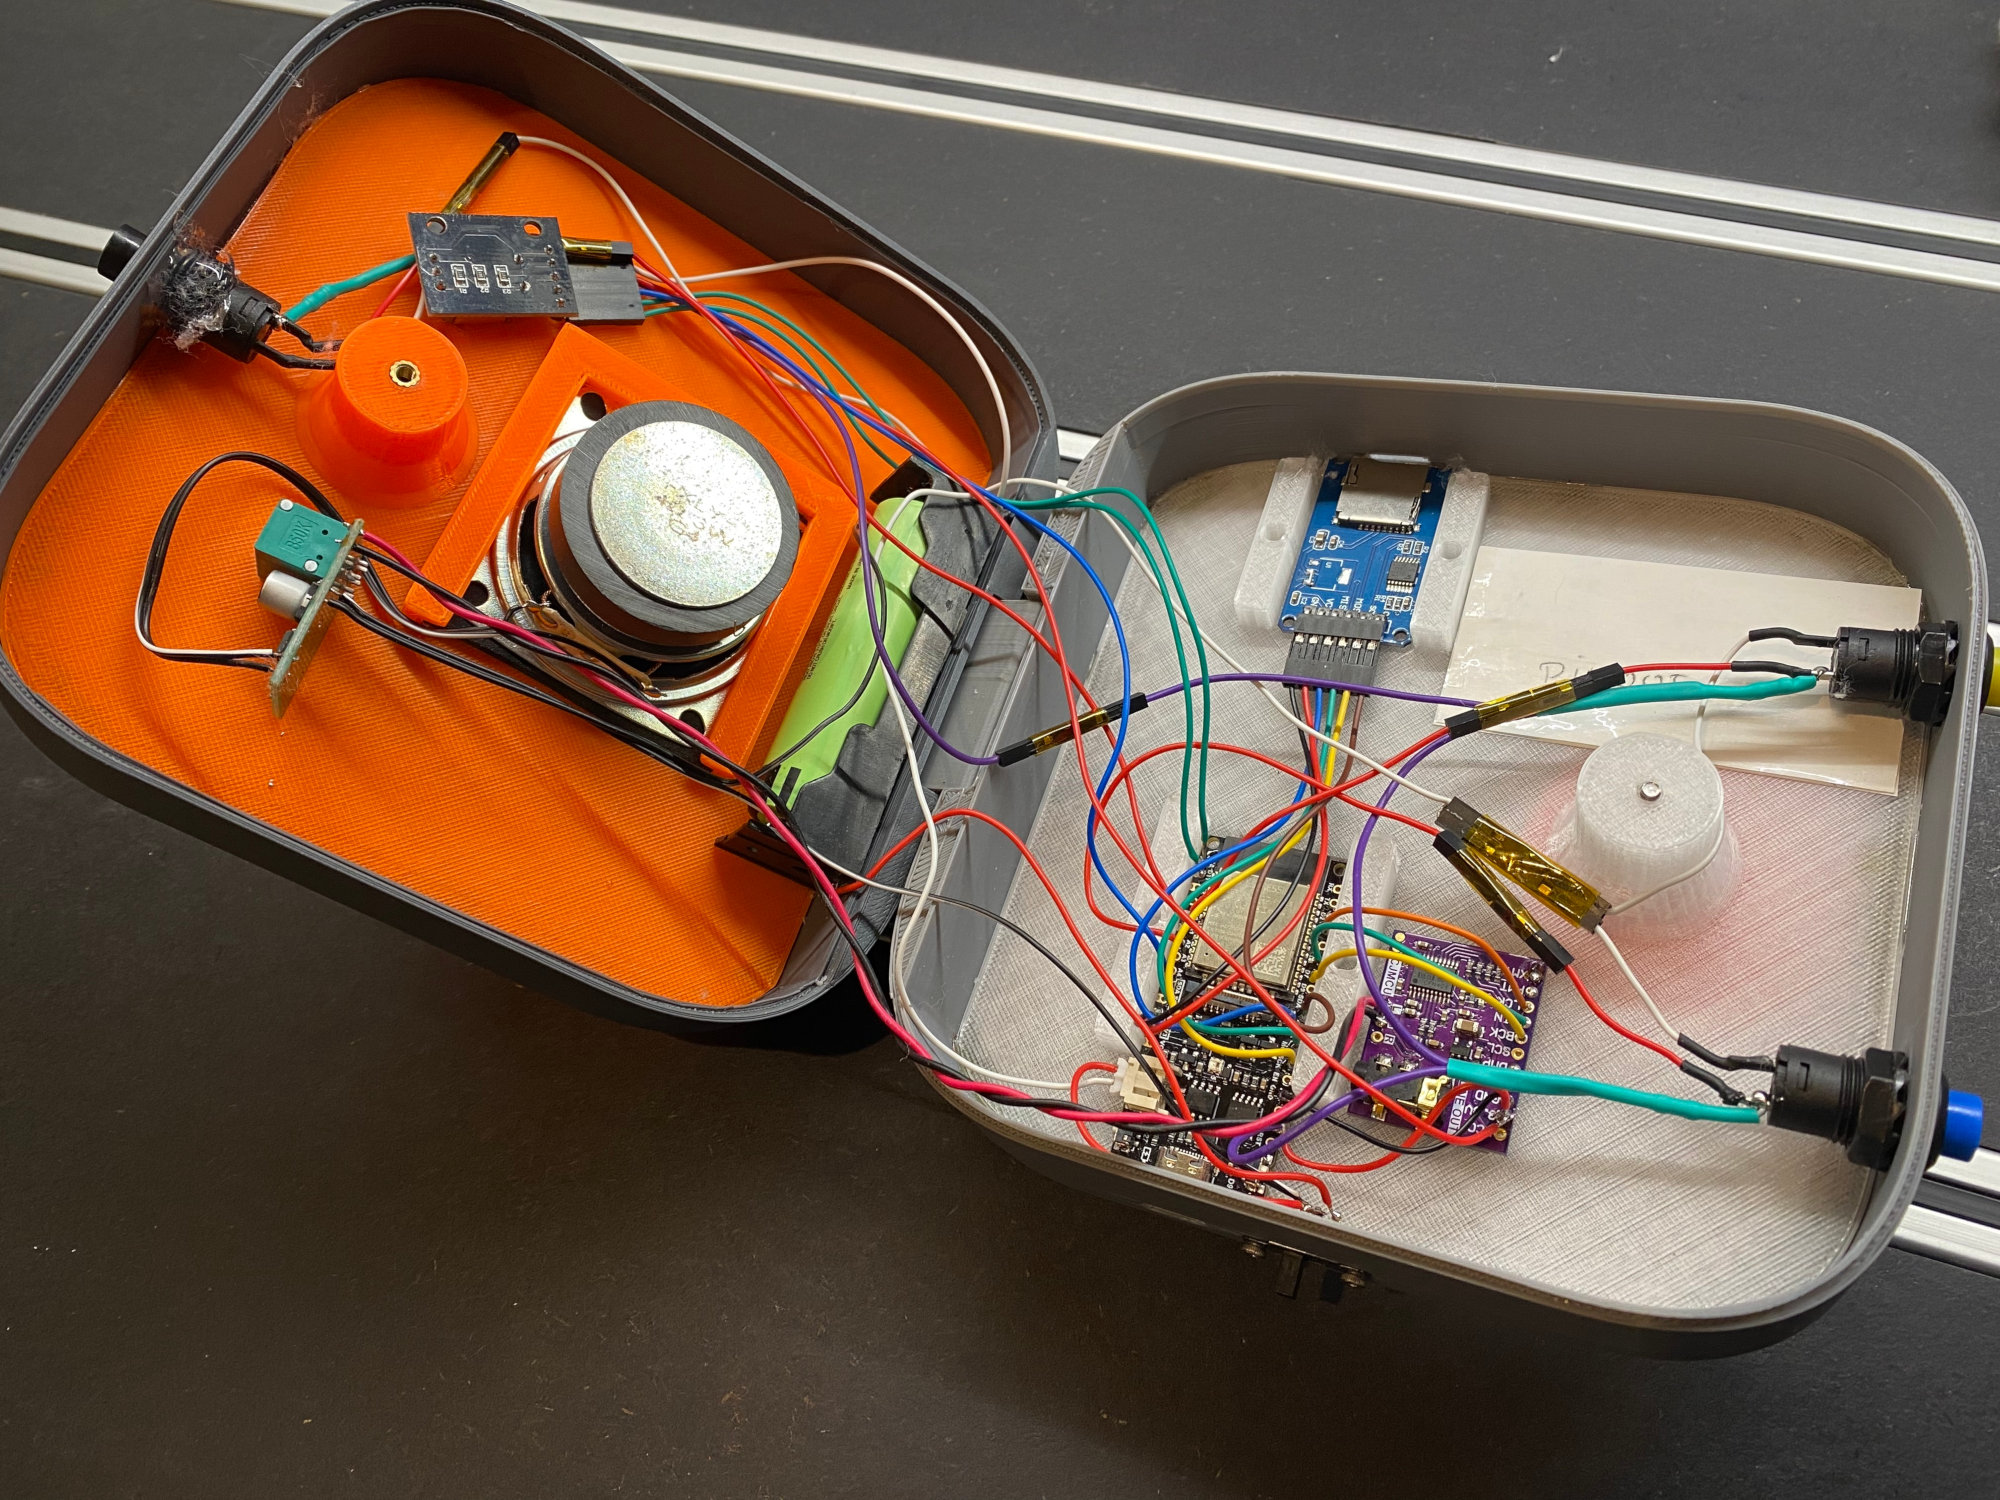
For the button pullup resistors I soldered them in-line with a wire and applied heatshrink over them (greenish heatshrink in the photo).
The development boards are glued with double sided tape and if needed you can apply the braces on top and stuff them with some foam tape or something rubbery to hold the boards down firmly.
The Speaker will slide into the printed rails but it will rattle around, you need some foam tape or foam rubber strips to wedge the speaker into.
Firmware
The firmware is in the Github repository and is to be built with platform.io
The Arduino framework is used and these external libraries:
- ESP8266Audio 1.9.7 (Audio components)
- RotaryEncoder 1.5.3 (Encoder knob)
- AceButton 1.10.1 (Buttons)
- FixedPoints 1.1.2 (3 Band Equalizer)
Just open this repository in a Platform.io IDE of your choice and click "Build and Upload"
Stuff you may want to change
SD-Card read speed
If you get errors on the serial debug console output about the SD-Card not working, you may have a slow SD-Card, go to
src/main.cpp
around line 35 and change the following line:
#define SPI_SPEED 4000000u
40 MHz is the default and the maximum speed the ESP32 can handle. Try reducing to 20MHz or 15 MHz until the SD-Card works. If you go too slow sound will be crackling and boot times will increase.
Equalizer settings
As the EQ settings depend on the materials you printed the enclosure, print settings and
the used speaker driver you probably want to play with those settings a bit. You can find
them in
src/main.cpp
at around line 150.
Search for these lines:
  eq = new AudioOutputFilter3BandEQ(output, 500, 5000);
  eq->setBandGains(1.5, 0.9, 1.3);
The first line sets the cutoff frequency of the EQ bands, so in this example we have 3 Bands:
- 0-500 Hz
- 500-5000 Hz
- 5000-22050 Hz
Those values are approximate as the algorithm implemented for the EQ is very simple and not accurate at all, but as we're dealing with very simple and cheap components here it is usually ok to use that.
The second line sets the equalizer band gains. If you set them all to 1.0 you should hear the original sound. I recommend to use values in the range of 0.75 to 1.5 . If you go under or over those the sound may distort or clip, I warned you!
SD-Card
To properly function the speaker needs an SD-Card to store voice prompts and configuration. I personally tried with 16GB SD-Cards and it worked fine (those were the smallest cards i could get from my supplier), I think that is enough space for this project as two full days of music are just under 4GB and if you put too many directories on there the boot time of the device will take ages as it needs to build an index of the contents on boot up.
To prepare the SD-Card for the speaker:
- Format the SD-Card to FAT32
-
Put all files from the
sd-cardfolder directly onto the SD-Card
SD-Card contents
This is a quick how-to for the SD-Card contents of LittleSpeaker
root files
We have some files that reside on the root directory (Top level, under windows this is directly on the drive in no folder).
-
wifi.txtWiFi settings, this file contains 2 lines:- WiFi name, attention this is case sensitive
- WiFi password in plaintext
-
webradio.txtURLs to webradio streams, start a line with#to include comments. See webradio below for more info
If the connection to the WiFi does not work check the following:
- WiFi has to be on the 2.4GHz band, 5GHz does not work
- WiFi has to support WPA2
- If nothing else is the problem, check that you're using "Unix line endings", this is usually only a problem on Windows machines.
System directory
The
system
directory should contain the announcer voice files to be used for
the menu system, I will describe which one is which in the following.
The default announcer voice has been generated with a text to speech computer voice, but if you want you can exchange them for another voice.
Format of the files should be a stereo MP3 file with a reasonable bitrate and length usable for the task. Remove all ID3 tag data to make the menu more responsive.
-
Numbers 1 to 99 (e.g.
1.mp3): Will be used for- Album numbers if there is no announcer (see below at album directories )
- Track numbers in albums
- Webradio station numbers
-
album.mp3used before an album number -
bluetooth_on.mp3used when entering the bluetooth menu and turning bluetooth on -
bluetooth_pair.mp3played when a device pairs to LittleSpeaker in bluetooth mode -
bluetooth.mp3menu title for the bluetooth menu -
connection_failed.mp3played when a connection to a webradio station fails or is disconnected by the server. -
hello.mp3will be played on bootup after SD-Card index has been created -
sd.mp3menu title of the SD-Card menu -
stopped.mp3played when an album has finished, the user disconnects a webradio station by pressing stop or when a device disconnects from bluetooth -
track.mp3played when in an album before the track number -
webradio.mp3menu title of webradio menu
webradio
Requirements
There are some things you'll have to consider for the streams that can be played by the firmware of LittleSpeaker:
- The stream has to be an IceCast or ShoutCast stream.
-
You have to link to a stream, not the stream's playlist. Usually webradio
stations will link a playlist file (either
m3u,m3u8orpls) which contains multiple streaming URLs to provide multiple servers. - The stream has to be MP3, AAC and HeAAC (or AAC+) do not work currently.
- Keep the bitrate at a reasonable value, 320 kBit is cool and all, but you will probably not hear a difference to a 192 kBit (or even a 128 kBit) stream.
- Try to keep to http and not https as it is faster to process on device
- Maximum line/URL length is 255 characters
- Maximum number of stations is 25
Announcer
If you want LittleSpeaker to tell you a webradio name instead of the channel
number in the menu you can add an audio file to the
webradio
directory. The
file should be a
stereo
MP3 file with a reasonable bitrate and length.
Name it the channel number in two digits (leading zero). The file will be played
back if you select the channel.
Verification
To verify a Stream URL fetch it with curl like this:
curl -v http://ice2.somafm.com/groovesalad-128-mp3
You will get an output like this:
*   Trying 173.239.76.149:80...
* Connected to ice2.somafm.com (173.239.76.149) port 80
> GET /groovesalad-128-mp3 HTTP/1.1
> Host: ice2.somafm.com
> User-Agent: curl/8.4.0
> Accept: */*
>
< HTTP/1.1 200 OK
< Content-Type: audio/mpeg
< Date: Fri, 12 Jan 2024 18:42:54 GMT
< icy-br:128
< icy-genre:Ambient Chill
< icy-name:Groove Salad: a nicely chilled plate of ambient beats and grooves. [SomaFM]
< icy-notice1:<BR>This stream requires <a href="http://www.winamp.com/">Winamp</a><BR>
< icy-notice2:SHOUTcast Distributed Network Audio Server/Linux v1.9.5<BR>
< icy-pub:0
< icy-url:http://somafm.com
< Server: Icecast 2.4.0-kh15
< Cache-Control: no-cache, no-store
< Expires: Mon, 26 Jul 1997 05:00:00 GMT
< Connection: Close
< Access-Control-Allow-Origin: *
< Access-Control-Allow-Headers: Origin, Accept, X-Requested-With, Content-Type, Icy-MetaData
< Access-Control-Allow-Methods: GET, OPTIONS, SOURCE, PUT, HEAD, STATS
<
Warning: Binary output can mess up your terminal. Use "--output -" to tell
Warning: curl to output it to your terminal anyway, or consider "--output
Warning: <FILE>" to save to a file.
* Failure writing output to destination
* Closing connection
It is good if curl tells you the content is a binary stream as this means
you actually got a stream URL and not the playlist that is linked. If you get
back text, it's probably a list of URLs. Sometimes you will get back a redirect
which means the service jumps to another server, you will see that if a
Location
header is in the server response. Try that URL instead.
To verify you got an IceCast stream look for
icy-
-Headers which tell the device
Stream metadata.
You will get back a
Content-Type
-Header usually. This should be
audio/mpeg
for
streams that are supported. If you get
audio/aac
or something like that you
got an incompatible stream.
Album directories
All directories that are not named
system
or
webradio
are assumed to be
music albums that can be played back. The Firmware can currently only play back
MP3 files, but some MP3 files contain big chunks of ID3 Metatag data and will
crash the Firmware. So if you're selecting an album, press play and then hear
the announcer voice greeting you with a
hello
something went wrong. Check
if you can remove the metadata from the files to fix that. Also make sure to
put
stereo
MP3 files on the SD-Card, mono files may play back at double speed.
If you want LittleSpeaker to announce your albums put a
album.mp3
in each
directory that should have a title. If that file is missing you will get an
announcer that tells you something like
Album thirtyfive
when selecting the
album on the menu.
If for some reason the album will play back in a wrong order you can put an
album.m3u
or
album.m3u8
into the directory. The firmware will then use the
order specified in that playlist. Make sure the playlist only lists the filenames
without any directory traversal.